Primers & Sealers
Primers and sealers play a crucial role in the plastering process by preparing surfaces for the application of plaster or similar materials
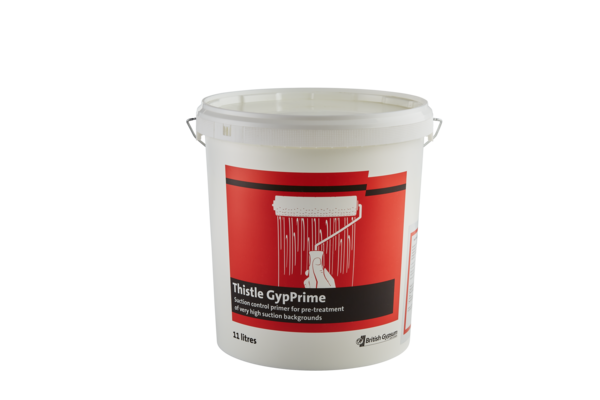
Thistle GypPrime
Thistle GypPrime
This special primer modifies surfaces to help retain water and prevent adhesion failures when plastering onto very dry or high suction backgrounds.
Thistle GypPrime
This special primer modifies surfaces to help retain water and prevent adhesion failures when plastering onto very dry or high suction backgrounds.

This special primer modifies surfaces to help retain water and prevent adhesion failures when plastering onto very dry or high suction backgrounds.
Thistle GypPrime makes your job easier, giving you extra working time by reducing the suction base to prevent rapid drying.
It's easy to apply by roller, brush or spray, and is coloured yellow so you can see where you've treated. When the primer is diluted, it can cover up to 600 square metres. However, you can also apply it neat to correct extremely dry surfaces
- Lengthens the working time of plasters on very high suction background by helping them retain water, and minimises potential for adhesion failure caused by rapid dry-out
- Yellow in colour - easy to avoid missing any areas
- Can be diluted - normally 1 part to 5 parts water provides adequate suction control, or can be used neat if necessary to control extremely severe suction
- One tub covers up to 600 sq.m (diluted 1:5) or 100 sq.m undiluted
- Easily applied by suitable roller, brush or spray Large container allows application directly from the tub
- Helps to consolidate dusty backgrounds
Thistle GypPrime: Effective Suction Control for Plastering
Thistle GypPrime is a specialised primer developed by British Gypsum to control suction on high-suction backgrounds before applying plaster. Ideal for creating an optimal base, Thistle GypPrime is particularly effective on surfaces like dry or porous backgrounds, ensuring even absorption and improving plaster adhesion.
Key Benefits of Thistle GypPrime
- Reduces Background Suction: Thistle GypPrime is designed to control the rate of absorption on highly porous surfaces, ensuring plaster sets evenly and remains workable.
- Enhances Plaster Adhesion: By reducing suction, Thistle GypPrime helps plaster adhere better, minimising cracking and creating a more durable finish.
- Versatile Application: It is suitable for a wide range of backgrounds, including masonry, concrete, and undercoat plasters.
How to Apply Thistle GypPrime
Proper application is key to achieving the best results with Thistle GypPrime. Follow these steps for effective use:
- Surface Preparation: Ensure the background is clean, dry, and dust-free. Remove any loose debris to provide a smooth, ready surface.
- Mixing: Stir Thistle GypPrime thoroughly before use. Dilute with water as required, with a maximum ratio of 1 part GypPrime to 5 parts water for high-suction surfaces.
- Application: Apply Thistle GypPrime with a roller or brush, covering the surface evenly. Take care to protect adjacent areas from splashes.
- Drying: Allow Thistle GypPrime to soak into the background and dry to a tacky finish before plastering.
Technical Specifications
| Property | Details |
|---|---|
| Colour | Yellow |
| Volume | 11 litres |
| Coverage | 100m² undiluted; up to 600m² diluted at 1:5 ratio |
| Application Temperature | Above 5°C |
Tips for Optimal Results
- Avoid Freezing: Store Thistle GypPrime in a cool, dry area, above freezing temperatures.
- Monitor Ambient Temperature: Keep the application area above 5°C to ensure proper adhesion and drying.
- Protect Surfaces: Ensure surrounding surfaces are protected to prevent splashes and stains.
Common Questions about Thistle GypPrime
Can I apply Thistle GypPrime on low-suction surfaces?
While Thistle GypPrime is most effective on high-suction surfaces, it can be used on other backgrounds if additional suction control is required. However, other primers may be better suited for non-porous surfaces.
What happens if I apply plaster before Thistle GypPrime is dry?
Applying plaster on a wet primer can result in uneven drying, which may impact adhesion and durability. Ensure that Thistle GypPrime is tacky or fully dry before proceeding with plaster application.
Conclusion
Thistle GypPrime is an essential product for plasterers working with high-suction backgrounds. By effectively managing absorption, it improves plaster adhesion, prevents issues like cracking, and contributes to a more professional and durable finish. For more tips on plastering techniques and products, visit the British Gypsum website or explore other resources on plasteringfx.com.
Thistle Bond-it gives you better plaster adhesion on smooth and low suction backgrounds.
Thistle Bond-it gives you better plaster adhesion on smooth and low suction backgrounds.
Simply apply it by roller straight from the tub for a strong chemical key. It also includes aggregate particles for better mechanical bonding.
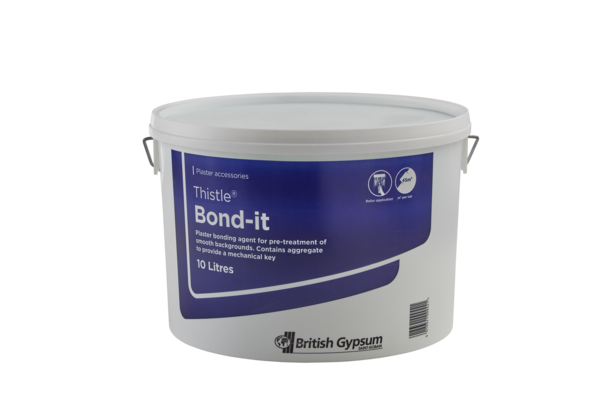
Thistle Bond-it gives you better plaster adhesion on smooth and low suction backgrounds.
Simply apply it by roller straight from the tub for a strong chemical key. It also includes aggregate particles for better mechanical bonding.

Thistle Bond-it gives you better plaster adhesion on smooth and low suction backgrounds.
Simply apply it by roller straight from the tub for a strong chemical key. It also includes aggregate particles for better mechanical bonding.
The bonding agent is green so it's easy to see where you've treated, and it's quick to apply as you only need a single coat for the full effect.
Key facts
- No dilution - use straight from the tub
- Provides a strong chemical and mechanical key
- Green colour to see where you've treated
- Plaster as soon as dry
- Use on Thistle BondingCoat and MR plasterboards
If you're plastering, a good grip coat is essential and you won't go far wrong using this Febond…
If you're plastering, a good grip coat is essential and you won't go far wrong using this Febond…
If you're plastering, a good grip coat is essential and you won't go far wrong using this Febond blue grit plaster bonding agent. The fine aggregate means this high-performance primer gives an improved key when
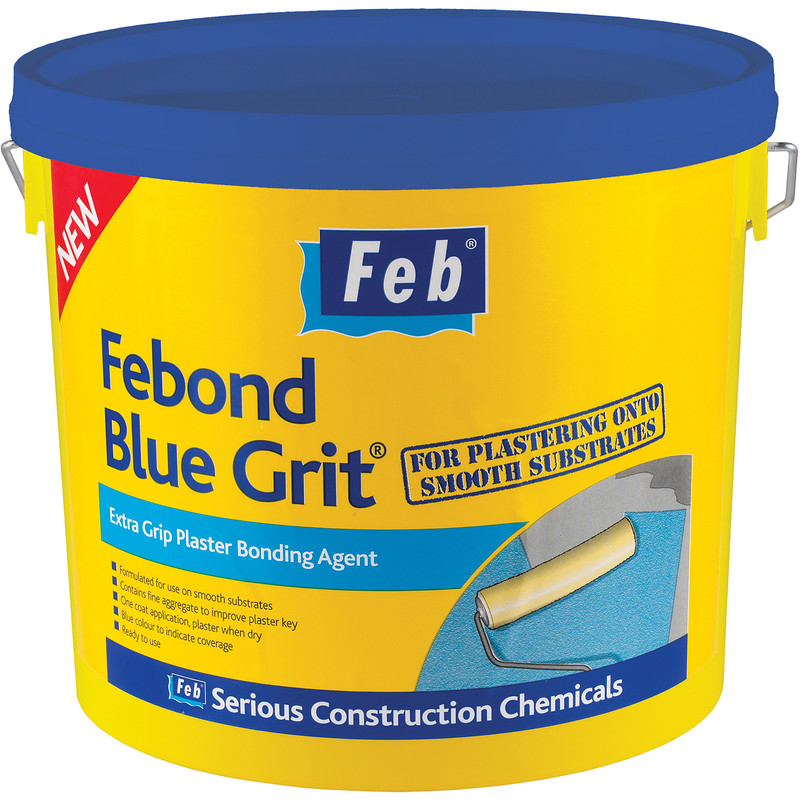
If you're plastering, a good grip coat is essential and you won't go far wrong using this Febond blue grit plaster bonding agent.
If you're plastering, a good grip coat is essential and you won't go far wrong using this Febond blue grit plaster bonding agent. The fine aggregate means this high-performance primer gives an improved key when

If you’re plastering, a good grip coat is essential and you won’t go far wrong using this Febond blue grit plaster bonding agent. The fine aggregate means this high-performance primer gives an improved key when you’re working with smooth surfaces like concrete, ceramic tiles or painted/textured walls. When plastering, you’ll find it’s just the thing for a level, professional finish.
At 10 L, the heavy-duty bucket will be more than up to the job with less need to buy frequently. Plus, it’s wide enough to easily dip a paint roller or large brush in there. The bright blue colour will indicate coverage and consistency.
This Febond primer only requires a one-coat application so there’s no need to re-apply. It's also water-based, so you'll only need to allow it to dry for 24 hours before plastering. You'll find that with a coverage of approximately 4-5 m² per litre, you can get a lot of use out of this plaster bonding agent.
- This primer/sealer is a high performance plasterers’ gripcoat
- Fine aggregate which provides an improved key on smooth substrates
- Use on plaster, concrete, ceramic tiles and painted or textured surfaces
- One-coat application – coloured blue to indicate coverage
- Provides a coverage of approximately 4-5m² per litre
- Allow to dry thoroughly for a minimum of 24 hours before applying plaster
- Suitable for interior use only
PVA is a glue for binding and sealing construction materials
PVA is a glue for binding and sealing construction materials
You can use the glue to prime rough-textured surfaces before plastering or painting, or as a general dust sealant on flaking paintwork and walls.
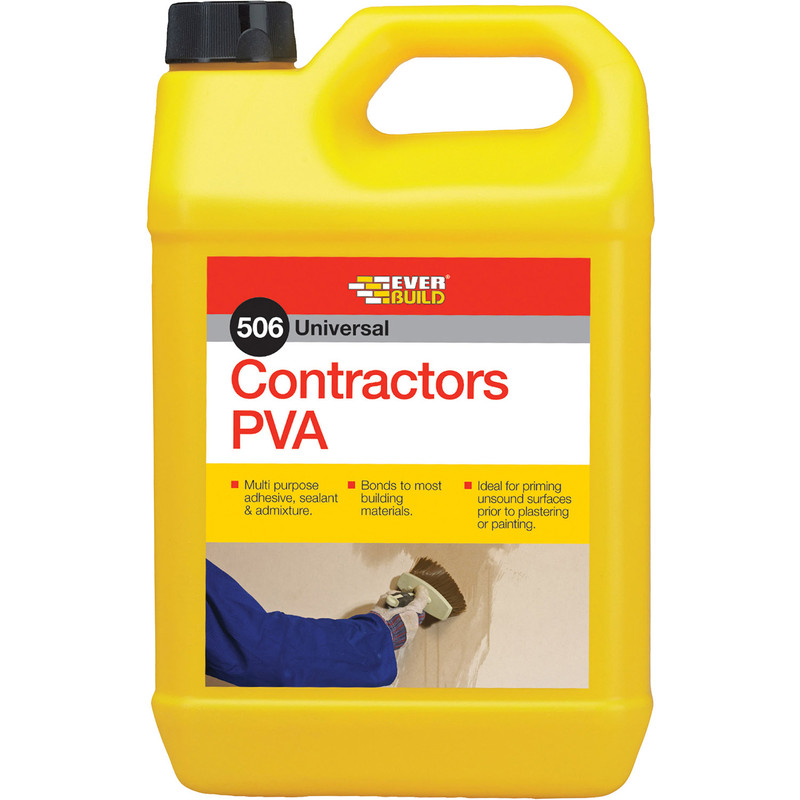
PVA is a glue for binding and sealing construction materials
You can use the glue to prime rough-textured surfaces before plastering or painting, or as a general dust sealant on flaking paintwork and walls.

Everbuild's 506 Contractors PVA is a glue for binding and sealing construction materials. It can be added to mortar and screed to make the substance easier to shape. You can use the glue to prime rough-textured surfaces before plastering or painting, or as a general dust sealant on flaking paintwork and walls.
The glue pours well for its thickness and is easily diluted if you need a runnier consistency. Because it's designed to adhere to building surfaces like interior walls, it has a super-strong adhesion that works particularly well with wood, cork, paper and textiles.
- Multi-purpose bonding agent
- Adheres to most common surfaces
- Can be used as a primer as well as a sealer
- Can be painted over
Common Faults
Common plastering faults include cracking from rapid drying or poor preparation and delamination caused by inadequate adhesion or contaminated surfaces.
Shudders in the plasterwork

A trowel used by the inexperienced can vibrate or chatter as it is dragged across certain surfaces causing ripples in the finished.
This normally accures when wet or dry troweling and whipping the trowel of to fast along the surface.
Primers & Sealers
Primers and sealers play a crucial role in the plastering process by preparing surfaces for the application of plaster or similar materials
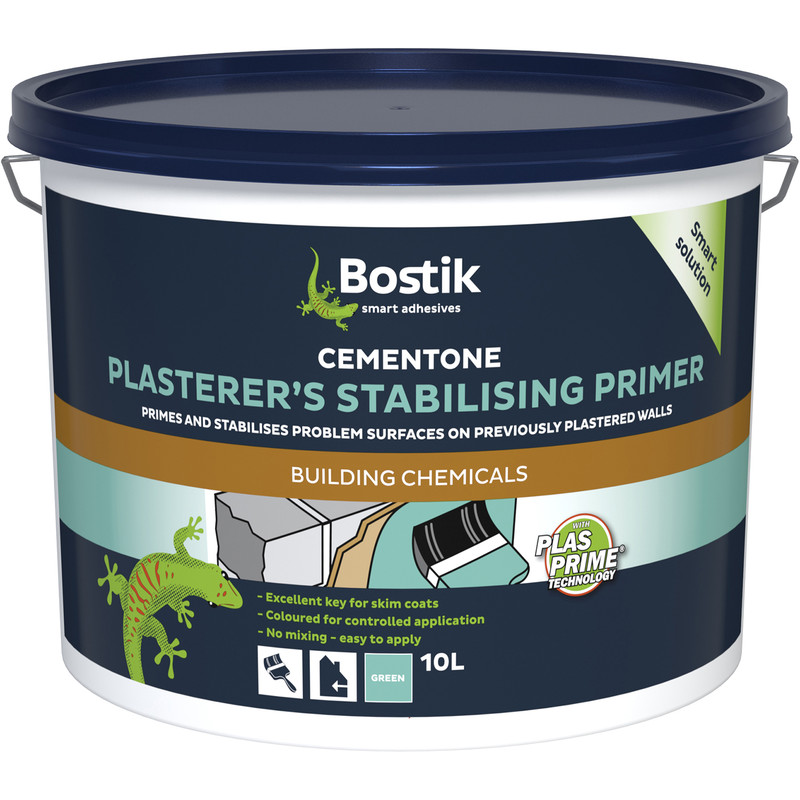
Make your plastering tasks a breeze with this handy primer from Bostik. Specially designed to stabilise surfaces prior to applying new plaster
Make your plastering tasks a breeze with this handy primer from Bostik. Specially designed to stabilise surfaces prior to applying new plaster
The primer is a useful shade of green, so you can see where you've already applied it. What's more, it contains 20% recycled materials – perfect for boosting your eco-credentials. It's versatile enough to use o

Bostik Plasterer's Stabilising Primer with Plasprime® Technology (formerly known as Cementone Plasterer’s Stabilising Primer) has been specially developed for the plastering professional. It primes and stabilises most interior surfaces, including previously plastered walls, prior to the application of new plaster. Bostik Plasterer's Stabilising Primer is green in colour for easy application and contains 20% recycled material. It can be applied over porous and non-porous areas to give a surface that dries evenly giving excellent adhesion and a faster, easier finish.
It has been specially developed for preparing old walls prior to re-skimming and can be applied over brick, blocks, concrete, plaster, plasterboard and render. It stabilises problem surfaces including: well adhered emulsion paint, wallpaper adhesive residues, old plaster/render, porous and non-porous surfaces.
Finish Plasters
Finish plasters provide the final touch to walls and ceilings, creating a smooth, seamless surface ready for decoration or painting.
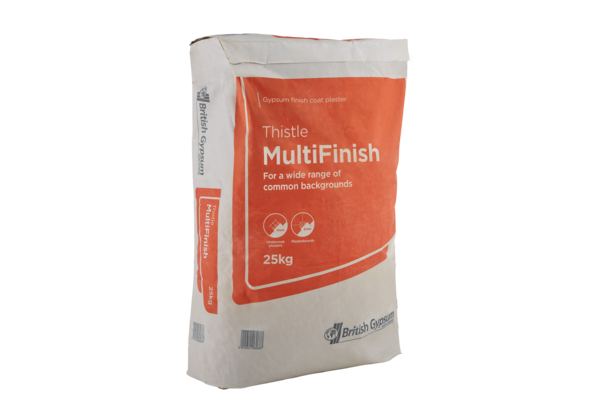
Thistle MultiFinish give an excellent finish, whatever the background. The UKs most popular plaster.
Thistle MultiFinish give an excellent finish, whatever the background. The UKs most popular plaster.
Thistle MultiFinish is the plasterers first choice for finishing most backgrounds. Quick and easy to apply, it has excellent workability and a reliable setting time.
Thistle MultiFinish give an excellent finish, whatever the background. The UKs most popular plaster.
Thistle MultiFinish is the plasterers first choice for finishing most backgrounds. Quick and easy to apply, it has excellent workability and a reliable setting time.

This versatile finishing plaster provides smooth results on all common plaster and plasterboard backgrounds.
Thistle MultiFinish is the plasterers' first choice for finishing most backgrounds. Quick and easy to apply, it has excellent workability and a reliable setting time. This makes it the perfect skim coat plaster for a durable decorative finish to plasterboard walls or ceilings, or for finishing over undercoat plasters.
Key Facts
- Suits most common backgrounds
- Easy to work and apply by hand
- Excellent workability and a reliable setting time
- Offers a sound insulation improvement of up to 2dB for some GypWall systems
- Provides airtightness and seals gaps, limiting flanking routes for sound transfer
- The smooth, consistent surface is ideal for decoration
- 10m2 wall coverage per bag
- No sanding required
Thistle BoardFinish is a skim coat plaster thats easy to hand apply for a smooth finish to plasterboard walls and ceilings.
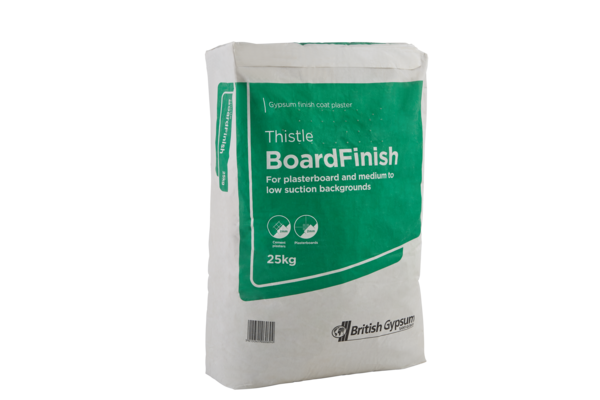
Thistle BoardFinish is a skim coat plaster that's easy to hand apply for a smooth finish to plasterboard walls and ceilings.
It creates a durable finish that protects walls and makes decorating with paint or wallpaper easy. The plaster is designed for use on low to medium suction backgrounds, making it the plasterers' favourite for finishing Gyproc WallBoard.
Key facts
- Suitable for most low to medium suction backgrounds
- Provides an ideal finish for plasterboards and Thistle DriCoat
- Easy to work and apply by hand
- Improves airtightness and seals gaps, limiting flanking routes for sound transfer
- The smooth, consistent surface is ideal for decoration
- 10m2 wall coverage per bag
- No sanding required
ThistlePro FastSet Finish gives a faster set time straight out of the bag without the need of…
ThistlePro FastSet Finish gives a faster set time straight out of the bag without the need of…
ThistlePro FastSet Finish is the guaranteed way to get the job done faster. It's a quick setting gypsum finish plaster that provides a smooth high quality surface finish.
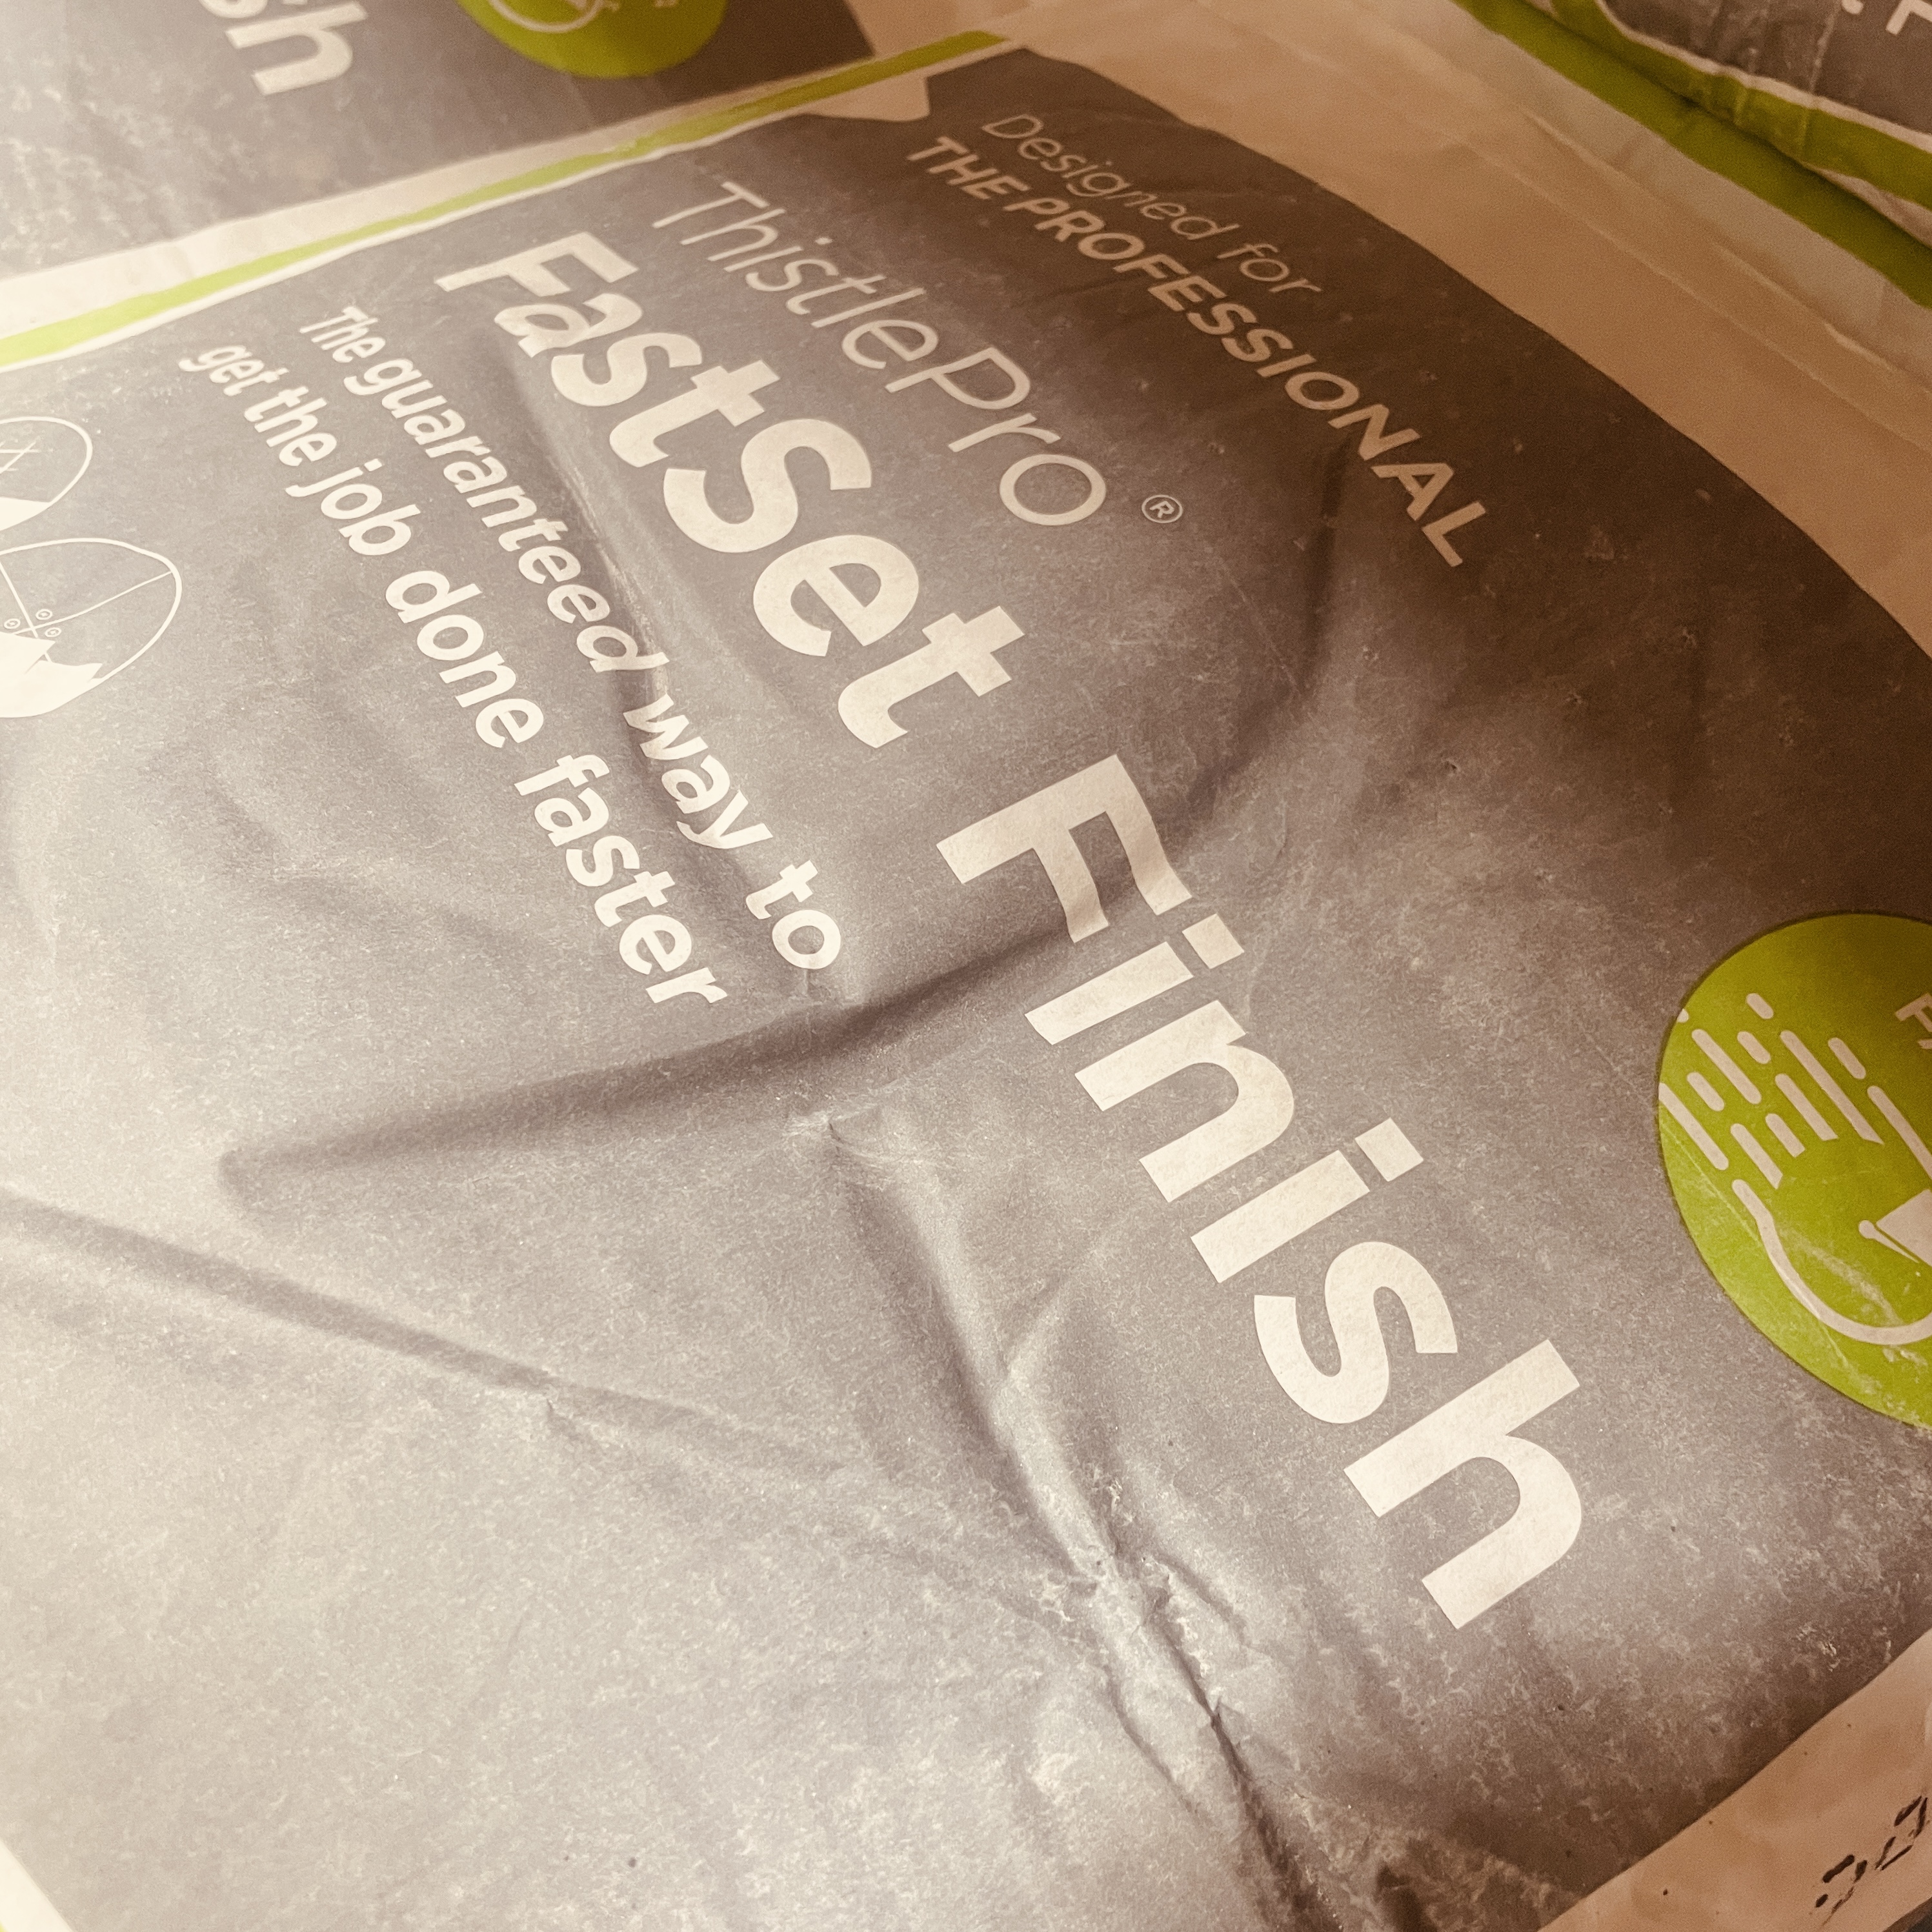
ThistlePro FastSet Finish gives a faster set time straight out of the bag without the need of additives.
ThistlePro FastSet Finish is the guaranteed way to get the job done faster. It's a quick setting gypsum finish plaster that provides a smooth high quality surface finish.

ThistlePro FastSet Finish gives a faster set time straight out of the bag without the need of additives so you can say hello to the peace of mind that comes with having the British Gypsum product guarantee.
ThistlePro FastSet Finish is the guaranteed way to get the job done faster. It’s a quick setting gypsum finish plaster that provides a smooth high quality surface finish. Ideal for patch and repair jobs as well as smaller internal walls & ceilings. It provides a durable base for applying decorative finishes.
Key facts
- Sets in just 60 minutes so you can get the job done faster
- Sets predictably every time, meaning no flash sets or waiting for gauges to go off
- Easy to apply for a smooth finish that’s ready for decoration
- Applies to all the same surfaces as Thistle MultiFinish when you use the same pre-treatment
- An all-in-one-bag solution, with no need to add anything for a fast set
- Tried, tested and backed up with a British Gypsum guarantee
- Gives you the strong finish you'd expect from a Thistle plaster while setting more quickly
- 10m2 wall coverage per bag
ThistlePro DuraFinish offers 60% more impact resistance than standard plaster, meaning it keeps walls looking smooth and clean in busy areas.
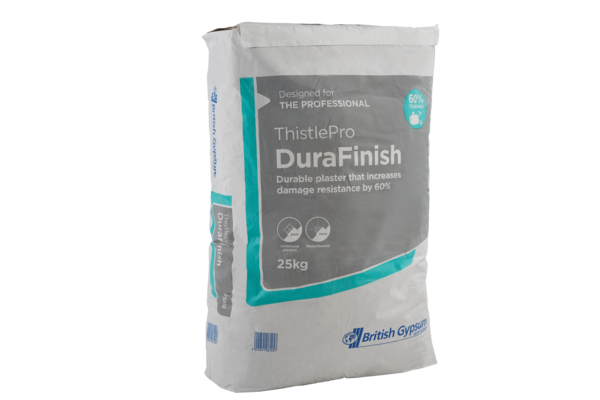
ThistlePro DuraFinish offers 60% more impact resistance than standard plaster, meaning it keeps walls looking smooth and clean in busy areas.
It shrugs off scratches, chips and bumps so that walls stay in tip-top condition for longer. This makes it ideal when you need to cut maintenance costs in bustling areas such as canteens and stairwells in schools and hospitals. It's also perfect for residential spaces where walls need to work harder.
Key facts
- 60% more hard-wearing than standard plaster
- Resists chips, scratches and glancing blows
- Keeps walls looking good for longer
- Cuts expensive maintenance by resisting impact
ThistlePro Magnetic plaster has a strong magnetic attraction means you can hang paintings and other items without any fixings.
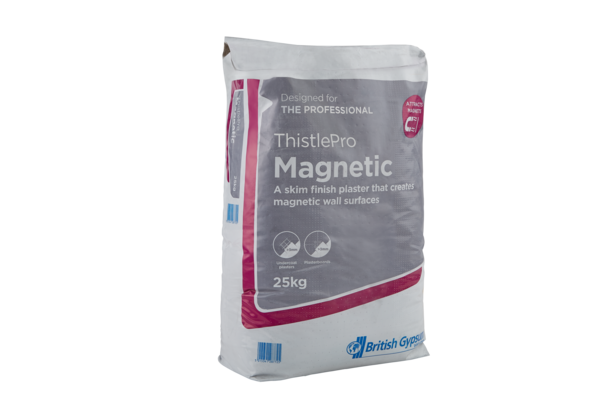
With ThistlePro Magnetic, it's easy to do new things with your walls.
The finishing plaster's strong magnetic attraction means you can hang paintings and other items without any fixings, and then move them when you want without leaving any damage.
Simply decorate the plaster as normal, or add whiteboard or chalkboard paint to create an interactive wall for schools, offices or children's bedrooms. Magnetic plaster is also a great choice for feature walls in living spaces.
Key facts
- Lets you hang items without fixings
- Means you can reorganise walls without causing damage
- Attracts magnets even when decorated
- Ideal for home offices, kitchens, children's bedrooms and feature walls
- Perfect for meeting rooms, notice boards and reception areas at work
ThistlePro PureFinish plaster helps to make indoor air healthier by absorbing one of the most common airborne pollutants.
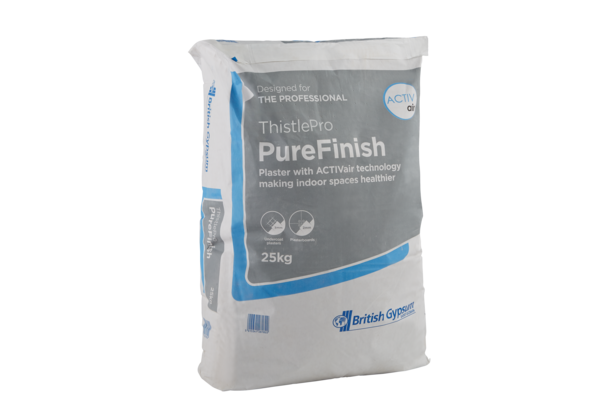
ThistlePro PureFinish plaster helps to make indoor air healthier by absorbing one of the most common airborne pollutants.
We spend around 90% of our time inside, so clean indoor air is important. Our ACTIVair® technology absorbs formaldehyde released by things like carpets, paints and pets, and turns it into harmless compounds so it can't be released back into the room.
In high concentrations, formaldehyde causes health problems such as headaches and breathing problems, and can even be carcinogenic. Removing it helps keep occupants healthy, boosts focus, and improves sleep.
Key facts
- Boosts indoor air quality to help improve health and comfort
- Turns harmful emissions into inert compounds
- Contributes BREEAM points to management plans
- Works with breathable emulsion paints
- Offers the same fire and durability performance as standard plasters
Undercoat Plasters
Undercoat plasters serve as a robust foundation for finish plasters, ensuring a strong and even base on various surfaces for a flawless final layer

Thistle HardWall backing plaster is first choice for plasterers working with medium to high suction backgrounds.
Thistle HardWall backing plaster is first choice for plasterers working with medium to high suction backgrounds.
You can apply it by hand or by spray machine for extra speed and convenience. Thistle HardWall is ideal for most medium to high suction backgrounds, including masonry such as bricks and aircrete block

Thistle HardWall is a gypsum-based undercoat plaster designed for use on a variety of masonry substrates, providing a strong, robust base for finish plasters. It is typically used for medium to high suction backgrounds like brick or blockwork. Here’s a detailed overview of Thistle HardWall, its applications, and some key tips for proper use.
Key Features of Thistle HardWall
- High Coverage: Thistle HardWall offers good coverage, making it an economical choice for large areas. It is typically applied at a thickness of around 11 mm to 25 mm.
- Suitable for Masonry Substrates: This plaster is suitable for most masonry backgrounds, such as bricks and medium-density blocks, making it a versatile option for various projects.
- High Impact Resistance: The plaster provides strong, durable undercoat that can withstand significant impact, making it ideal for heavy-use areas.
- Rapid Drying: It dries more quickly than traditional undercoat plasters, allowing for faster finishing.
Application Process
When applying Thistle HardWall, it is essential to prepare the background properly to ensure the best adhesion and a smooth finish:
- Prepare the Surface: Before applying Thistle HardWall, ensure that the background is clean, dry, and free from any dust, loose material, or grease. If the background is very dry or high suction, use a suitable primer like Thistle GypPrime to control suction and improve bonding.
- Mixing the Plaster: Add the plaster to clean, fresh water (never the other way around) and mix thoroughly until smooth and free of lumps. Follow the manufacturer’s recommendations for water-to-plaster ratio to achieve the right consistency.
- Applying the Plaster:
- Apply the first coat of Thistle HardWall to a uniform thickness of around 11 mm.
- Use a hawk and trowel to ensure even application and a smooth finish.
- If needed, a second coat can be applied to achieve the desired thickness (up to 25 mm).
- Trowelling and Finishing:
- Once the plaster begins to firm up, use a trowel to smooth and level the surface.
- Depending on site conditions, the plaster can be floated for a finer finish or left rough for a key to receive a finish coat, such as Thistle MultiFinish.
- Drying Time: Drying time for Thistle HardWall depends on ambient conditions, but it typically dries within a few hours. However, the final drying will take longer if the background has higher suction or in cooler environments.
Practical Tips
- Priming High-Suction Backgrounds: For high-suction backgrounds such as lightweight blocks, apply a suction control primer (like Thistle GypPrime) to reduce the rate of moisture absorption, ensuring proper adhesion of the plaster.
- Avoid Over-Mixing: Over-mixing can lead to air bubbles and weaken the plaster. Aim for a smooth, lump-free consistency without introducing too much air.
- Consider Environmental Factors: Be aware that colder environments may extend drying times, and higher humidity may slow the plaster's setting. Always ensure the work area is adequately ventilated to allow the plaster to dry correctly.
Conclusion
Thistle HardWall is an excellent choice for undercoat plastering on masonry surfaces. It offers versatility, strength, and durability, making it ideal for both domestic and commercial projects. When applied correctly and paired with appropriate finish plasters like Thistle MultiFinish, Thistle HardWall provides a strong, smooth surface ready for painting or decorating.
For more detailed guidance and additional products, visit the British Gypsum website or consult their comprehensive installation guides.
Thistle BondingCoat backing plaster is first choice for plasterers working with smooth or low…
Thistle BondingCoat backing plaster is first choice for plasterers working with smooth or low…
Its easy to spread and finish thanks to its fine mix and good workability, making it the ideal undercoat on new walls, or for making good old walls before skimming with British Gypsum finishing plaster.
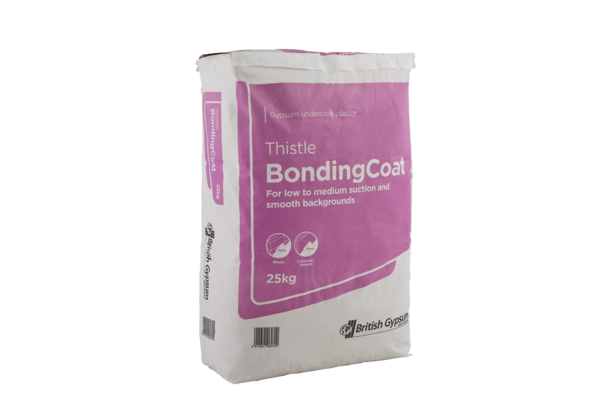
Thistle BondingCoat backing plaster is first choice for plasterers working with smooth or low suction backgrounds.
Its easy to spread and finish thanks to its fine mix and good workability, making it the ideal undercoat on new walls, or for making good old walls before skimming with British Gypsum finishing plaster.

Thistle BondingCoat backing plaster is first choice for plasterers working with smooth or low suction backgrounds.
It's easy to spread and finish thanks to its fine mix and good workability, making it the ideal undercoat on new walls, or for making good old walls before skimming with British Gypsum finishing plasters.
Key facts
- Undercoat plaster for low suction surfaces
- Ideal for new walls, or for making good old walls
- Good workability due to a fine mix
- Ideal for applying directly to plasterboard where dubbing out is required
- Provides an excellent base coat for Thistle finishing plasters
- Pre-treatment is required for painted surfaces
Thistle Bonding 60 lets you patch and repair walls quickly, with no cracking or shrinkage.
Thistle Bonding 60 lets you patch and repair walls quickly, with no cracking or shrinkage.
The plaster has a 45 minute working time, a 60 minute set, and is ready to skim in just 75 minutes. This makes it ideal when you need to carry out everyday repairs quickly and easily, or when making walls good

Thistle Bonding 60 provides a consistent 60 minute set time. The shorter set time allows patching and repair to be completed in half the time compared to standard Thistle BondingCoat Undercoat Plaster. Coverage based on 11mm thickness.
How does it differ from existing Thistle Bonding Coat?
Aside from the reduced working time (45min) and setting time (60min), Bonding 60 has a different smell and feel to it compared to other Thistle Undercoat plasters. The additional polymers and additives needed has given the plaster a unique texture to work with, often compared to older formulation products in how it feels to work with.
The reduced performance timescales does mean some changes to established site practice – for example Thistle Bonding 60 will set on the edges of tools if left too long before cleaning down. Also, we would strongly recommend using clean water and a clean bucket for mixing up in if you want to avoid inconsistent performance.
What about backgrounds not listed here?
Try a small test area before the larger job.
At the extreme High Suction end of the range, suction control is needed, e.g. with Thistle Bond-it or PVA. Otherwise, crazing or shrinkage might be seen after application of the first coat. If this happens, stop and control the suction before carrying on.
When suction is high but not extreme, suction control may still be advisable sometimes, but is not usually necessary. For example a small high suction patch in an otherwise low suction wall, or a large area of high suction that must be finished in one operation. When suction is low or moderate, or if a smaller high suction area needs finishing, then pre-treatment is not needed.
What are the product benefits of Thistle Bonding 60?
- Thistle Bonding 60 cuts out the dead-time in your small patching jobs and working day
- Excellent workability on medium and low suction backgrounds
- Easy to mix and easy to use, with enhanced workability
- Saves time during the day to get home quicker
- Suitable for use on a wide range of backgrounds in various conditions
What backgrounds are in scope for Thistle Bonding 60?
We would recommend the use of Thistle Bonding 60 on medium to lower suction backgrounds, in renovation and refurbishment applications.
All backgrounds need to be clean, sound and free from dust.
No pre-treatment is needed for;
- Medium-density blocks
- Engineering bricks
- Metal lathing
We would recommend pre-treatment with;
- Dense blocks
- Plasterboard
- Cast-in-situ & pre-cast concrete
- Painted/tiled surfaces
- Ceilings
What is the setting time?
Thistle Bonding 60 does what it says on the sack; set in 60 minutes. We recommend planning for a 45 minute working time, and waiting until 75 minutes before skim. Please note that like other Thistle Plasters you will see set-time performance changes based on the suction of the background and the method of control you apply.
Plasterboard
Plasterboard is a versatile and lightweight construction material, widely used to create smooth surfaces for walls and ceilings, facilitating quick and efficient installations.
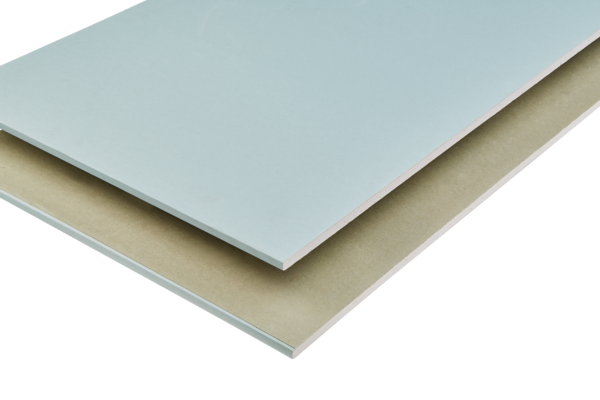
Gyproc Moisture Resistant Plasterboard protect bathrooms and kitchens from damage caused by high humidity.
Gyproc Moisture Resistant Plasterboard protect bathrooms and kitchens from damage caused by high humidity.
High moisture levels can lead to mould and staining, and could even cause structural damage. This moisture resistant board stops humidity getting in to ward off mould and help protect the structure of the build

Gyproc Moisture Resistant plasterboard protects walls and ceilings from high humidity, preventing damage in wet areas like kitchens and bathrooms.
High moisture levels can lead to mould and staining, and could even cause structural damage. This moisture resistant board stops humidity getting in to ward off mould and help protect the structure of the building.
Key facts
- Boards won't need to be replaced after exposure to high humidity
- Helps prevent structural damage caused by moisture
- Reduces the risk of mould and staining caused by moisture
- Achieves H1 water absorption according to EN 520
- Green paper lining for easy identification
Gypsum plasterboard with water repellent additives in the core and paper liners. Gyproc Moisture Resistant consists of an aerated gypsum core with water repellent additives encased in, and firmly bonded strong paper liners. Gyproc Moisture Resistant is a plasterboard that is suitable for drylining internal surfaces.
Plastering
Plastering should not normally be specified to Moisture Resistant and MR grade boards. These types of board are intended for use in environments of higher than normal humidity for which no gypsum plaster is designed to be suitable. Where moisture resistant board options are used in shell and core construction to provide temporary resistance to high moisture conditions, they can be skimmed at a later
date after the building envelope has been made weather-tight. Plaster should be applied only to the face of moisture resistant boards and pre-treatment with ThistleBond-it is required.
Gyproc FireLine is a fire resistant plasterboard that withstands fire for longer to allow for safe…
Gyproc FireLine is a fire resistant plasterboard that withstands fire for longer to allow for safe…
The board's excellent fire resistance rating makes it ideal for lining walls and ceilings in commercial spaces like offices and shopping centres, as well as in low rise housing and new build garages.
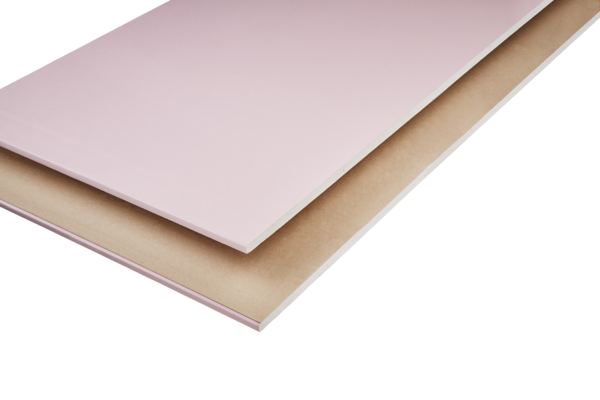
Gyproc FireLine is a fire resistant plasterboard that withstands fire for longer to allow for safe evacuation
The board's excellent fire resistance rating makes it ideal for lining walls and ceilings in commercial spaces like offices and shopping centres, as well as in low rise housing and new build garages.

Gyproc FireLine is a fire resistant plasterboard that withstands fire for longer to allow for safe evacuation.
The board's excellent fire resistance rating makes it ideal for lining walls and ceilings in commercial spaces like offices and shopping centres, as well as in low rise housing and new build garages.
Key facts
- Resists fire to allow for safe evacuation
- Pink paper facing for easy identification
Installation
Effect of temperature:
Start decorating as soon as possible after the finishing system is dry. Finish jointing systems with Gyproc Drywall Primer before painting.
Effect of condensation:
The thermal insulation and ventilation requirements of national Building Regulations aim to reduce the risk of condensation and mould growth in new buildings. However, designers should take care to eliminate all possibility of problems caused by condensation, particularly in refurbishment projects.
Cutting:
Either cut the board with a plasterboard saw, or score the front face paper with a sharp knife, snap it over a straightedge, then cut the back face paper. Cut holes for things like socket boxes using a utility saw.
Fixing:
Fix the board with the decorative side facing outwards to receive finishes. Install fixings at least 13mm from cut edges and 10mm from bound edges. Position cut edges at internal angles wherever possible. Stagger horizontal and vertical joints between layers by at least 600mm.
Jointing:
After fixing the board, start finishing it as soon as you can to limit the risk of damage or UV degradation to the paper liner. You can finish the board using jointing systems that comply with EN13963, including the Gyproc range.
Full-surface finishing:
After fixing the board, start finishing it as soon as you can to limit the risk of damage or UV degradation to the paper liner. You can finish the board using plaster that complies with EN13279-1, including the Thistle range.
Painting:
Start decorating as soon as possible after the finishing system is dry. Finish jointing systems with Gyproc Drywall Primer before painting.
Wallpapering:
Decoration should start as soon as practicable after the finishing system is dry. Jointing systems should be finished with Gyproc Drywall Sealer before application of wallcoverings.
Snagging and minor repairs:
For minor damage and dents, check that the board core isn't shattered. If it's intact, fill the damaged area with Gyproc EasiFill 60, allow it to set, then apply a second coat if you need to. When it's dry, sand it to a finish before redecorating the area.
For a damaged core, broken edges or extensive damage, repair and replacement procedures differ depending on the number of board layers and fire resistance of the system; please contact our Technical Support Team for specific advice.
Why are there so many different types of plasterboard? Roger explains.
Why are there so many different types of plasterboard? Roger explains.
Gypsum Plasterboard consists of a sheet of gypsum sandwiched between two layers of stout, specially processed paper. Gypsum Plasterboard was first manufactured in the UK over 90 years ago.

Why are there so many different types of plasterboard? Roger explains.
Gypsum Plasterboard consists of a sheet of gypsum sandwiched between two layers of stout, specially processed paper. Gypsum Plasterboard was first manufactured in the UK over 90 years ago.

What types of plasterboard are there?
Moisture-resistant plasterboard
In the core of moisture-resistant plasterboard are some additives which repel moisture. These plasterboards are the only suitable plasterboards for kitchens and bathrooms as the humid environment will otherwise decay the quality of the board over time and can result in loss of effectiveness of any insulating properties. Using non-moisture-resistant plasterboard in a moist area will lead to damp, rot and mould over time.
Buy from Wickes
Acoustic plasterboard
Opt for acoustic plasterboard and you’ll get additional benefits over just being able to finish off the room. Acoustic plasterboard will keep the sound out of the room and reduce how noise travels between rooms to give a more private and comfortable life for those living there. Utilising acoustic plasterboard in a living room refurbishment, for example, will mean that a loud movie won’t disrupt a quiet chat in the kitchen.
Buy from Wickes
Damp Proof Foil Backed plasterboard
Damp-proof plasterboard is equipped with a layer of foil attached to one side. It can be used in environments that are associated with an appreciable level of moisture (such as kitchens).
Buy from Wickes
Fire-resistant plasterboard
Fire-resistant plasterboard does exactly what it says on the tin. It’s important to become familiar with and choose the right fire performance rating as each rating denotes a different thing. Some fire-resistant plasterboard may be non-combustible, whereas some may offer 240 minutes of fire resistance before it will catch fire. If fire-resistant plasterboard isn’t specified and is just an optional extra, it’s worth choosing what suits your application best. If it’s specified then pick the correct performance rating to meet building regulations.
Buy from Wickes
Insulated plasterboard
Insulated plasterboard is a favourite amongst dry liners as it’s so easy to install. It’s essentially a piece of insulation board faced with plasterboard but the fact that they’re already bonded together and ready to go makes the process faster and more efficient than if you were installing a layer of insulation and then plasterboard. Just like regular plasterboard, this type can be finished without plastering over too.
Buy from Wickes
Info credit: https://www.insulationsuperstore.co.uk
Rendering
Rendering involves applying a mix of sand, cement, and sometimes lime to exterior walls for protection and a smooth finish. It enhances durability and can be textured or painted.
Cement
Cement is a binder, a substance that sets and hardens and can bind other materials together. The word "cement" traces to the Romans, who used the term opus caementicium to describe masonry resembling modern con
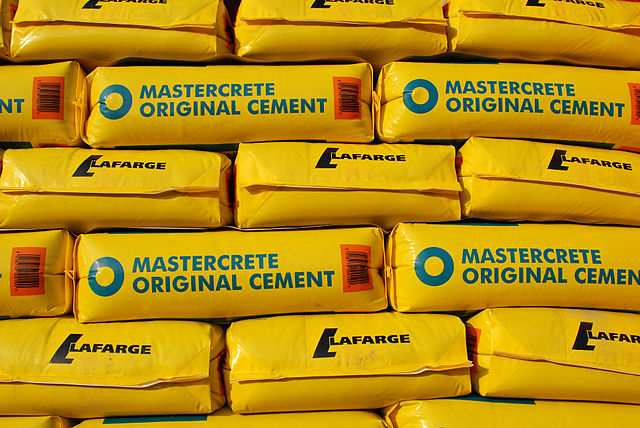
With external renders, two types of cement are used. OPC (Ordinary Portland Cement) is 75% limestone and 25% cement and grey. White Portland Cement is 75% limestone and 25% white china clay and is white. WPC is used when a lighter coloured render is needed.Cement sets due to a chemical reaction so temperature effects the time it takes to set. If the cement is in a warm environment, it will set quicker than in a cold environment. The final set time should be no more than 10 hours.
Special purpose cements are sometimes used. For example, sulphate-resisting portland cement will be used instead of normal portland cement if there is sulphate present .
Lime is normally used in external plastering on old buildings.
A cement is a binder, a substance that sets and hardens and can bind other materials together. The word "cement" traces to the Romans, who used the term opus caementicium to describe masonry resembling modern concrete that was made from crushed rock with burnt lime as binder. The volcanic ash and pulverized brick supplements that were added to the burnt lime, to obtain a hydraulic binder, were later referred to as cementum, cimentum, cäment, and cement.
Cements used in construction can be characterized as being either hydraulic or non-hydraulic, depending upon the ability of the cement to be used in the presence of water.
Non-hydraulic cement will not set in wet conditions or underwater, rather it sets as it dries and reacts with carbon dioxide in the air. It can be attacked by some aggressive chemicals after setting.
Hydraulic cement is made by replacing some of the cement in a mix with activated aluminium silicates, pozzolanas, such as fly ash. The chemical reaction results in hydrates that are not very water-soluble and so are quite durable in water and safe from chemical attack. This allows setting in wet condition or underwater and further protects the hardened material from chemical attack (e.g., Portland cement).
The chemical process for hydraulic cement found by ancient Romans used volcanic ash (activated aluminium silicates). Presently cheaper than volcanic ash, fly ash from power stations, recovered as a pollution control measure, or other waste or by products are used as pozzolanas with plain cement to produce hydraulic cement. Pozzolanas can constitute up to 40% of Portland cement.
The most important uses of cement are as a component in the production of mortar in masonry/brickwork, and of concrete, a combination of cement and an aggregate to form a strong building material.
weber.pral M - Monocouche Render
weber.pral M - Monocouche Render
weberpral M is available in a range of 24 monocouche colours — from our ever-popular colours such as Chalk, Silver Pearl, Ivory and Cream, to our more colourful choices such as Azure Blue, Earth Red, Sage Green
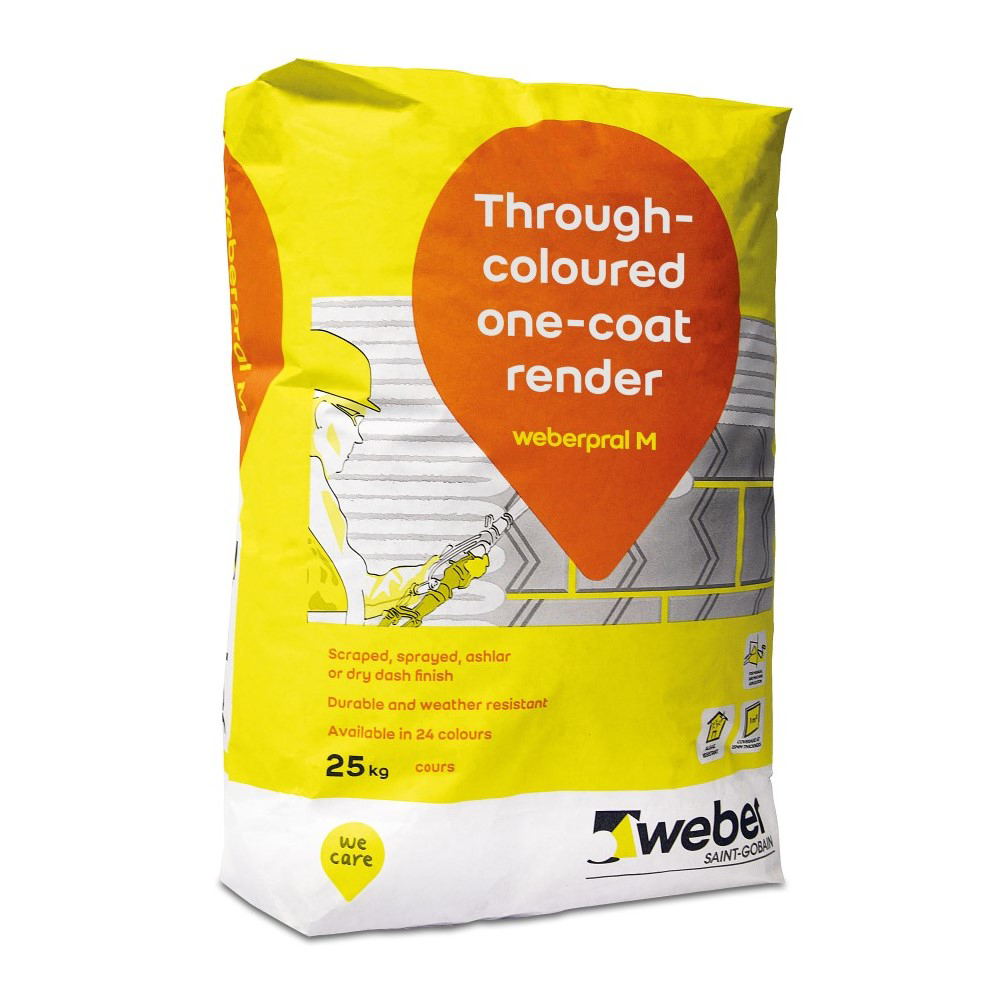
weber.pral M - Monocouche Render
weberpral M is available in a range of 24 monocouche colours — from our ever-popular colours such as Chalk, Silver Pearl, Ivory and Cream, to our more colourful choices such as Azure Blue, Earth Red, Sage Green

weber.pral M is a one coat, ready mixed, cementitious, weather resistant, external decorative, through coloured render, suitable for most types of brick or blockwork. Factory produced from carefully selected raw materials for consistency of product, it only requires the addition of water on site. The through colour and one coat features allow fast application with shorter programme periods, thereby reducing associated scaffolding and site costs and permitting the completion of ground works at an earlier stage. weber.pral M has been awarded an A+ Green Guide Rating as defined in the BRE Global 2008 Green Guide to specification.
Features and Benefits
- One coat for fast application and short programme periods
- Through coloured for low maintenance - decoration not required
- A+ Green Guide rating
- Factory produced for consistency of proportioning
- Ready mixed - only water required to be added on site for ease of use
- Formulated to be spray applied by render pump for faster application
- BBA approved certificate no. 05/4268
Colours & Finishes
weber.pral M is available is a range of 24 colours. 6 standard colours and 18 special colours. Specifiers should consult the weber.pral M Colour Chart and, whenever possible, obtain samples prior to specification.
Preparation
Scaffolding must be independently tied to allow for an uninterrupted application. Any faults in the structure, particularly those which may lead to moisture penetration must be rectified.
To avoid dampness and discolouration rendering should be avoided below DPC and within 150 mm of ground level.
All surfaces must be sound, clean, suitably dry and free of any material which may impair adhesion. The substrate should be suitable for rendering with a designation III mix (1:1:6).
Arrises and feature stops may be formed using clean straight timber battens.
Alternatively, suitable beads may be used but, with a scraped finish, these will be evident and must be accepted as a feature. Please note that scraped renders may, during the scraping process, tend to spall away from the nose of some angle beads. Refer to weber's Technical Department for advice on suitable profiles.
Mask as required. Edging tape must be removed before the material has dried.
Expansion joints should be included as required by the substrate and carried through all applied materials.
Do not apply to gypsum plaster or previously painted surfaces.
Mixing
weber.pral M should be mixed with 5 - 5½ litres of clean water using either a suitable render spray machine, drill and whisk or tumble mixer.
To ensure colour consistency, the materials required for complete and adjoining panels should be of the same batch number or be thoroughly mixed together before use.y.
For best results, use as little water as possible and mix to give a workable consistency.
Note: weber.pral M may stiffen on standing. Re-mix product to regain a workable consistency but do not add any more water.
Application
To maintain colour consistency, panels should be completed in sequence around the building.
Spray roughcast
Depending on the required finished thickness, a first pass is spray applied to a minimum thickness of 10 mm and ruled level. A second texture pass is applied between 1 and 2 hours after the first to form a single monolithic coat with a minimum thickness of 15 mm. Total finished thickness should be between 15 and 25 mm.
Scraped finish
weber.pral M should be applied to the suitable substrate in a one or two-pass operation to a minimum thickness of 18 mm, or to a maximum thickness of 28 mm. (2 - 3 mm will be removed by the scraping process to give a finished thickness of minimum 15 mm, maximum 25 mm.) It should then be ruled level and allowed to harden for between 5 and 16 hours. (Sometimes a longer period may be necessary depending on weather and background conditions.)
When weber.pral M is green (set but not fully hardened) it should be scraped with a circular action using a scraping tool. It is essential that this is done carefully and evenly, ensuring all laitance is removed and that no part is missed. Thoroughly brush down the surface of the scraped finish using a soft bristle brush.
Ashlar features
Apply weber.pral M in two passes to an initial thickness of between 20 mm and 28 mm to allow for an Ashlar recess from 2mm deep up to a maximum of 10 mm. Ensure a minimum of 15 mm thickness is maintained at the base of the recess for sheltered to moderate exposure. Rule level and spatula flat. When the material is still green, scrape the surface as detailed in the guidance notes for scraped finish.
Immediately after scraping, mark out and cut the Ashlar effect using weber Ashlar tools to produce the desired profile. Thoroughly brush down the surface of the render using a soft bristle brush. weber.pral M will set and gain hardness in a similar manner to conventional renders.
Protection from unfavourable weather conditions should always be provided during application and early age curing.
Good practice
Do not apply:
- If frost is forecast within 24 hours of use
- In damp/wet conditions
- In temperatures below 5°C or above 30°C
- On elevations in direct sunlight or where the substrate is hot
Curing
Curing with a fine spray of clean water may be necessary during rapid drying conditions.
In hot climates, curing as above is essential for 3-5 days after application.
What are rendering additives and why to use them.
What are rendering additives and why to use them.
Additives are liquid or powder ingredients normally used in render mixes that are cement based and should be measured carefully using the manufacturers instructions. There are different types of additives that
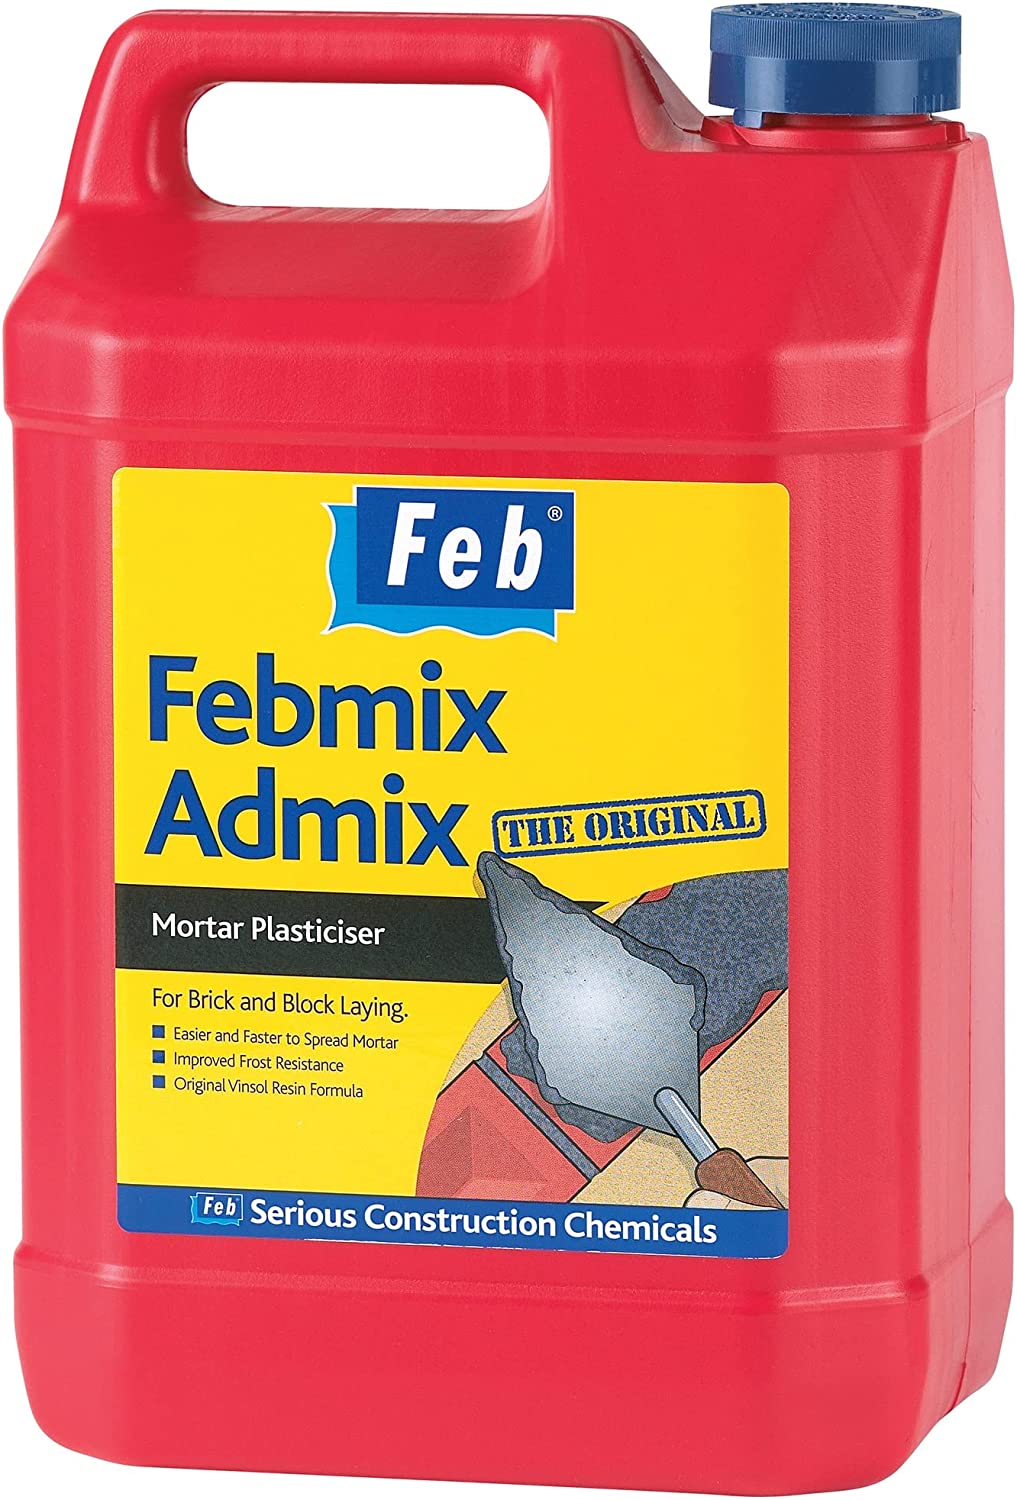
What are rendering additives and why to use them.
Additives are liquid or powder ingredients normally used in render mixes that are cement based and should be measured carefully using the manufacturers instructions. There are different types of additives that

Additives are liquid or powder ingredients normally used in render mixes that are cement based and should be measured carefully using the manufacturers instructions.There are different types of additives that can be used in cement based render;
Plasticiser is used to make the application easier.
Water-proofer is used to equalise suction and it creates a waterproof barrier.
Retarder is used in warmer environments to slow down the setting time.
Accelerator is used in colder environments to speed up the setting time.
Plasticizers are used in plastering mixes to make them easier to work with. They make air bubbles which stop friction between sand and other aggregates. The bubbles are still in the mix after it has set. This can help stop moisture build up. The air bubbles can sometimes be an advantage for when water expands in freezing temperatures. There are different types of plasticizers and others are used as a greasy lubricator to prevent friction between aggregates.
Bonding Adhesives are like glue because they stick to smooth surfaces and also plaster coats. Most adhesives are made of PVAC (polyvinyl acetate) but some are from polymers which have acrylic resins and styrene-butadiene rubber in. Styrene-butadiene does not react to moisture and is used most for external bonding adhesives. When applying bonding adhesives, you must read the manufacturers instructions carefully because the application process will be different.
There are three methods to apply bonding adhesive; brush, stipple and key coat.
Brush- for this you need apply a priming coat mixed with water, and then apply a priming that is not mixed with water. then apply the plaster while the adhesive is still wet.
Stipple - for this the adhesive needs to be mixed with cement and a small amount of sharp sand. The cement is stippled to make a key for the plaster to stick to.
Key coat - this is applied to the surface and a notch trail is used to make a key for the plaster to stick to.
Bitumen style solution is a different kind of adhesive. It is waterproof so can be used in areas where damp would normally be a problem. It creates the base for gypsum plaster to be applied on smooth surfaces. The solution should be applied to the surface with a brush. Once it has been applied, dry sand should be put on it while it is still wet. 24 hours is the recommended time you should wait before applying the floating coat.
Glass fibres are put in some plaster and sand/cement mixtures. This is to make the mix stronger. Glass fibres are chopped into strips and added to rendering materials when they are being manufactured with either white Portland cement r ordinary Portland cement.
With gypsum plaster mixes, special chopped up strips of glass fibre are added. These mixes are a lot stronger than haired plaster mixes.
Installing External Wall Insulation - Is it a DIY Job?

Traditional sand, cement and lime rendering - old but gold?

Traditional sand, cement, and lime rendering has been a mainstay of exterior and interior finishes for centuries. While modern alternatives like gypsum-based plasters and synthetic renders have gained popularity in recent times, traditional rendering remains a trusted and valuable method for many construction projects, especially in restoration and renovation work. In this article, we will explore the reasons why this technique is still considered "old but gold" in the world of plastering and rendering.
The Composition and Benefits of Traditional Render
Traditional sand, cement, and lime rendering involves a mix of three key components: sand, cement, and lime. Each of these materials brings unique benefits to the mix:
- Sand: Provides bulk and texture to the render. The type of sand used (fine or coarse) affects the final appearance and finish.
- Cement: Acts as the binder, giving the render its strength and durability. It ensures the material adheres well to the wall surface.
- Lime: The lime component is what sets traditional render apart from modern cement-only mixes. Lime makes the render more flexible, breathable, and easier to work with. It also improves the render's resistance to cracking.
One of the key advantages of adding lime to the mix is its breathability. Lime renders allow moisture to evaporate from the walls, which helps to prevent issues like damp and mould in older buildings. This is especially beneficial in historical restorations where modern cement renders might trap moisture, causing long-term damage to the structure.
Durability and Flexibility
Traditional render, when properly mixed and applied, can be incredibly durable. It offers significant protection against the elements, making it ideal for external walls. The inclusion of lime ensures that the render remains flexible enough to accommodate slight movements in the underlying structure. This flexibility reduces the risk of cracking, which is a common problem in modern cement-only renders.
Furthermore, traditional sand, cement, and lime rendering is suitable for a wide range of surfaces, including brick, block, and stone walls. Its versatility and adaptability make it an attractive option for both new builds and restoration projects.
Historical and Aesthetic Appeal
One of the main reasons traditional rendering remains popular today is its historical authenticity. In the restoration of period properties, maintaining the original look and feel of the building is essential. Modern renders may not provide the same aesthetic appeal, especially in older properties with intricate detailing or historic finishes. Traditional render can be textured or finished in various ways to match the original look, whether it's a smooth, polished finish or a more rustic, roughcast appearance.
The visual appeal of traditional render is enhanced by the natural patina that develops over time, giving buildings a timeless, aged appearance that is difficult to replicate with modern materials.
Application and Workability
Working with traditional sand, cement, and lime render requires skill and experience. The mix ratios need to be carefully controlled to ensure the right balance of flexibility, strength, and breathability. Typically, a mix ratio of 1 part lime, 1 part cement, and 6 parts sand is used, though this can vary depending on the specific requirements of the job and the condition of the wall surface.
Lime renders are more forgiving in terms of working time compared to modern cement-based renders. They allow for longer periods of adjustment and correction during application. This makes lime-based renders a preferred choice for intricate work, where the renderer needs more time to create the desired finish.
Environmental Benefits
Lime is a natural material that has been used in construction for thousands of years. It is less energy-intensive to produce compared to cement, making it a more environmentally friendly option. Furthermore, lime continues to absorb carbon dioxide as it cures, effectively reducing the carbon footprint of a building over its lifetime. This makes traditional rendering a more sustainable choice for those seeking to minimise the environmental impact of their construction projects.
Challenges and Considerations
While traditional sand, cement, and lime rendering offers numerous benefits, it does come with some challenges. The preparation and application process is more time-consuming compared to modern alternatives. Lime-based renders also require careful curing, which can take several days or even weeks depending on the weather conditions. This slower drying process can be a disadvantage for projects with tight deadlines.
Additionally, while lime renders are more flexible, they are also softer than modern cement-based renders. This means they may not be as suitable for areas that are subjected to heavy wear and tear or impact. In such cases, a harder, more resilient finish may be required.
Conclusion
Traditional sand, cement, and lime rendering may be considered "old," but it certainly still holds its value in modern construction. Its flexibility, breathability, and aesthetic appeal make it an excellent choice for restoration projects and period properties, while its durability and environmental benefits add to its appeal in new builds. For those seeking a finish that combines historical authenticity with practical advantages, traditional rendering remains a "gold" standard in plastering and rendering.
Whether you're working on a heritage restoration or a new construction project, considering the benefits of traditional rendering could ensure that your building not only looks good but also stands the test of time.
Tutorials
What is cement based plaster mixes
What is cement based plaster mixes
Cement was introduced into the industry just after the end of the Second World War. Made of 75% limestone and 25% clay.
What is cement based plaster mixes
Cement was introduced into the industry just after the end of the Second World War. Made of 75% limestone and 25% clay.

Cement-based plaster mixes
Cement was introduced into the industry just after the end of the Second World War. Made of 75% limestone and 25% clay, cement is a binder that provides a faster set and also provides strength in the mix. The introduction of cement in undercoat mixes meant buildings and plastering work had faster setting times. This allowed work to be completed more quickly, which suited the high demand for new housing after the war.
Cement mixed with sand and water will begin to set after 45 minutes and is normally completely set by the next day. However, the mixture can take several days to reach its final strength. This process is known as curing.
Although cement had advantages over lime mixes, it also had its own problems, such as shrinkage, mixes being too dense or brittle and irregular strength resulting in cracking. These days:
- Cement-based mixes are commonly used on renovation work or when harder background surfaces are required
- Cement and sand plastering mixes are commonly used on old buildings that have been treated with a chemical damp course
- Hydrated lime is sometimes added to cement and sand mixes to improve adhesion, workability and even increase suction for the finishing coat.
Cement- and lime-based plaster mixes should only be applied to solid backgrounds. The mix ratio commonly used is 5: 1 sand and cement, or 6:1:1 sand, cement and hydrated lime. However, mix ratios can vary, to take into account the strength and compatibility of the background.
The City & Guilds Textbook: Plastering for Levels 1 and 2
Mike Gashe & Kevin Byrne
What is lightweight backing and finishing plasters
What is lightweight backing and finishing plasters
Gypsum pre-mixed plasters have many advantages over traditional plastering materials because they have been designed and manufactured with a specific application in mind.
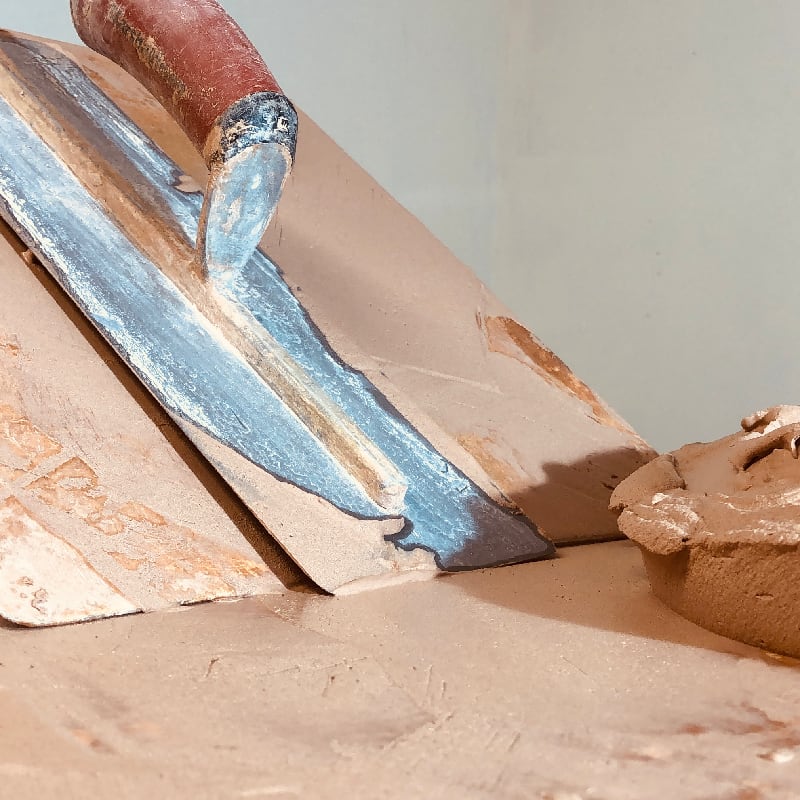
What is lightweight backing and finishing plasters
Gypsum pre-mixed plasters have many advantages over traditional plastering materials because they have been designed and manufactured with a specific application in mind.

Lightweight backing and finishing plasters
Gypsum pre-mixed plasters have many advantages over traditional plastering materials because they have been designed and manufactured with a specific application in mind. During the manufacturing process, plasters are tested in laboratories to ensure they satisfy their intended use. The range of plaster produced today can be used on low and high suction backgrounds.
Unlike cement- and lime-based plastering mixes, gypsum plasters contain manufacturer's instructions that provide user guidelines for each product. This provides additional performance benefits when specifying products for a particular design within a building. There are several different types of plaster available.
- Bonding-grade plaster is a pre-mixed undercoat plaster that contains vermiculite and perlite aggregate. Vermiculite is sharp and angular in shape, giving the plaster excellent bonding abilities compared with other types of plaster. This type of plaster is suitable for use on low suction and poorly keyed backgrounds, such as plasterboard or concrete.
- Undercoat plaster that contains perlite as the aggregate has to rely on the background havin the necessary key to ensure the plaster bonds sufficiently. This is because the perlite aggregate round and does not bond well to backgrounds the have a poor key.
- Thistle HardWall backing plaster is a pre-blended undercoat that contains additives to improve adhesion or cope better when there are high suction levels.
- Multi-finish plaster can be applied to a range of gypsum undercoats and to sand and cement backgrounds that have been keyed with a devil float
- Board Finish plaster is applied to plasterboard backgrounds
- ThistlePro DuraFinish has been developed for use in areas that are prone to greater impact than normal, such as high traffic areas where people walking past may frequently knock into the plaster. Durable plaster provides 60% more protection against damage compared with ordinary gypsum finishing plaster.
- ThistlePro PureFinish is a finishing plaster designed to make indoor spaces healthier as it has Activ-Air® technology.
Although gypsum plasters have advantages over traditional plaster mixes in terms of thermal values and heat resistance, gypsum undercoat plasters are not suited to older buildings which may contain areas that have been in contact with or affected by rising o penetrating damp. (This means the background might still contain some moisture.) Gypsum plasters have high absorption rates so this could result in problems if the dampness has not been treated and completely removed from the background. Gypsum plasters can become mouldy and eventually perish in persistently damp conditions.
Plastering manufacturers British Gypsum and Knauf have developed plasters that can be sprayed directly onto the background, saving time and labour by improving efficiency. However, spray machines can be impractical in residential properties due to the challenge of setting up the equipment in small tight spaces.
The City & Guilds Textbook: Plastering for Levels 1 and 2
Mike Gashe & Kevin Byrne
Prepare the background for plastering & testing the suction
Prepare the background for plastering & testing the suction
Building methods and materials are always evolving, with many changes to the way we work and our practices.
Prepare the background for plastering & testing the suction
Building methods and materials are always evolving, with many changes to the way we work and our practices.

Building methods and materials are always evolving, with many changes to the way we work and our practices. Modern materials have been developed and manufactured to improve the efficiency of mixing plaster and to ensure compatibility with different backgrounds, simplifying the plastering process. Despite this, plastering surfaces can still break down over time due to age, poor surface preparation or bad workmanship (including poor mixing).
The key to creating a good plaster surface is to identify and prepare the backgrounds beforehand. It is important to understand that not all backgrounds have the same properties. Some will be soft and weak, some will be hard and dense, while some backgrounds could be timber studwork, joists or metal furrings. Plasterboard fixed to old timber surfaces might need to be built out with backing plaster, depending on how uneven the surface is. This is quite common in old buildings that are being refurbished.
Different backgrounds need to be prepared for plastering in different ways. There are several steps you need to follow to make sure the plaster adheres well to the background surface. Before you start, you will need to control the suction and ensure the background has adequate key to ensure adhesion.
Suction Test
A suction test can be carried out by applying water on a solid background to see how much it absorbs. Checking the suction will tell you if the background is dry and porous. You can do this by splashing water onto the background with a brush. The quicker the water is absorbed, the higher the background's suction.
- No suction or low suction when the splashed water stays on the background's surface) will indicate that the background is hard or dense.
- High suction backgrounds (when the splashed water soaks in quickly) will absorb moisture from the plaster mix and might cause it to dry too quickly when applied.
PFX+ | Featured Article
Identifying and plastering different types of backgrounds.
Identifying and plastering different types of backgrounds.
There are many different types of backgrounds that you might need to plaster and their requirements.
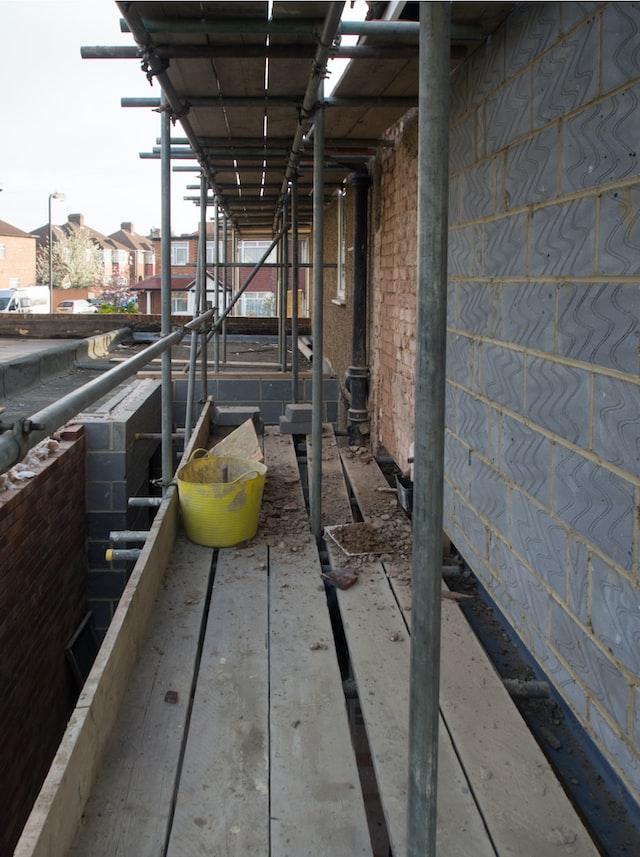
Identifying and plastering different types of backgrounds.
There are many different types of backgrounds that you might need to plaster and their requirements.

Hollow and solid blocks
Newly constructed buildings that have block walling need little preparation before you apply plaster to their surface, because they have medium to adequate key. The surface is flat and can be plastered using traditional or modern pre-mixed plasters. Block walling built to today's specifications and standards needs only a backing coat and finish, known as 'float and set'.
Lightweight aerated blocks
 These blocks are lightweight and weak with an adequate key but high suction levels. Cement-based mixes are not compatible with these backgrounds because they are too strong for this surface. This type of block is best suited for pre-mixed plasters that are weaker than the background direct bond dry lining. Applying a solution of PVA (polyvinyl acetate - a water-based glue used for preparing background surfaces by improving adhesion) diluted with water (to the manufacturer's instructions) will seal the surface and control the suction.
Plasterboard
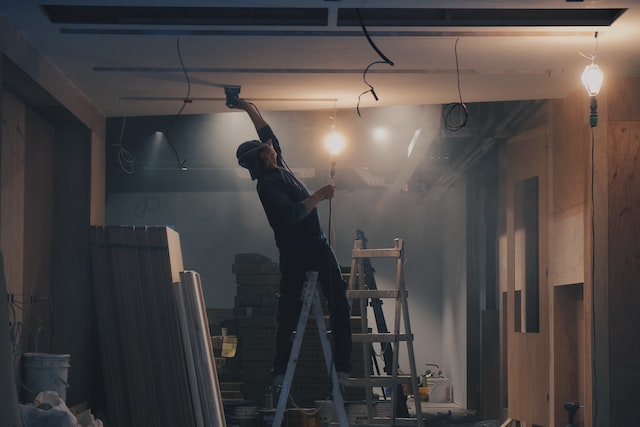 There are several different types of plasterboard, but they are all made with a plaster core within an outer skin of daper. Plasterboard may have square or tapered edges. Before applying plaster, the boards need to be reinforced at their joints to prevent cracking. Plasterboard has a flat surface with low suction and only requires a finish coat, applied using a one coat system consisting of two passes of finishing plaster at an average thickness of 3 mm. If plasterboard is to be fixed over uneven timber studwork, filling out may be required; this should be done using a bonding-grade backing plaster that contains the aggregate vermiculite.
Timber Lath
Laths were traditionally used on timber backgrounds. They consist of thin strips of wood over which plaster can be spread. It can be time-consuming to prepare, fix and plaster this surface. This type of background is still used in the restoration of listed buildings.
Existing solid walls
This type of surface is common where solid walls require a 'makeover' due to poor surface condition that has developed over time. Over-skim makeovers enhance the appearance of a wall by re-skimming the surface without removing the old plaster from the background.
When applying plaster to this type of surface, remember that it can only be as good as the background you plaster over. The surface must be solid and sound with no hollowness. Any flaking paint and surface grime or grease, that could prevent the new plaster from bonding, should be removed.
This background has no key and, if it is painted, usually no suction, unless the background has different properties that are hidden behind the decorated wall surface. For example, if the wall has been replastered after installation of electrical services, it might contain different plasters on the background, creating different suction rates.
A bonding adhesive should be applied to the surface of this background before it is replastered.
NVQ

PFX+ | Featured Article
Unit 641 - 3.2 Contribute to discussions by offeringproviding feedback relating to health, safety and welfare.
Unit 641 - 3.2 Contribute to discussions by offeringproviding feedback relating to health, safety and welfare.
Contribute to discussions by offeringproviding feedback relating to health, safety and welfare.
Unit 641 - 3.2 Contribute to discussions by offeringproviding feedback relating to health, safety and welfare.
Contribute to discussions by offeringproviding feedback relating to health, safety and welfare.

Health, safety, and welfare are crucial topics and ensuring their promotion should be a priority in any discussion or decision-making process.
When it comes to health, it's important to consider the physical and mental well-being of individuals. This can include access to proper healthcare, healthy working and living conditions, and promoting healthy lifestyles.
In terms of safety, it's important to consider measures that minimize risks and prevent accidents in various settings, such as the workplace, home, and public spaces. This can involve adhering to safety regulations, providing proper training and equipment, and conducting regular safety assessments.
Regarding welfare, it's important to ensure that basic needs are met and that individuals are able to live a fulfilling life. This can include access to adequate housing, food, and financial security, as well as support for mental health and personal development.
In summary, when offering feedback relating to health, safety, and welfare, it's important to consider the overall well-being of individuals and the steps that can be taken to promote and protect it.
PFX+ | Featured Article
Unit 641 - 2.5 State how changing circumstances within the workplace could cause hazards.
Unit 641 - 2.5 State how changing circumstances within the workplace could cause hazards.
State how changing circumstances within the workplace could cause hazards.

Unit 641 - 2.5 State how changing circumstances within the workplace could cause hazards.
State how changing circumstances within the workplace could cause hazards.

There are many different circumstances within the workplace that can change and create new hazards. Some examples include:
- Workload changes: An increase in workload, or the introduction of new tasks, can lead to increased physical or mental stress on workers.
- New equipment or technology: The introduction of new equipment or technology can create new hazards, such as exposure to hazardous substances or increased risk of electrical shock.
- Changes in the physical work environment: Changes in the physical work environment, such as the addition of new structures or the removal of protective barriers, can increase the risk of falls, trips, and other physical hazards.
- Changes in staffing: Changes in staffing, such as the loss of experienced workers or the addition of new workers, can lead to increased risk of accidents or injuries.
- Changes in weather or natural conditions: Changes in weather or natural conditions, such as extreme heat or cold, heavy rain or snow, or increased risk of fire or flooding, can create new hazards for workers.
It is important for employers to be aware of changing circumstances within the workplace and to assess and address any new hazards that may arise. This can help to ensure a safe and healthy work environment for all employees.
PFX+ | Featured Article
Unit 641 - 3.1 Interpret and comply with given instructions to maintain safe systems of work and…
Unit 641 - 3.1 Interpret and comply with given instructions to maintain safe systems of work and…
Interpret and comply with given instructions to maintain safe systems of work and quality working practices.

Unit 641 - 3.1 Interpret and comply with given instructions to maintain safe systems of work and quality working practices.
Interpret and comply with given instructions to maintain safe systems of work and quality working practices.

Interpreting and complying with instructions to maintain safe systems of work and quality working practices involves several steps:
- Understanding the instructions: It's important to take the time to read and understand the instructions thoroughly, asking for clarification if needed. This includes both written instructions, such as safety procedures and guidelines, as well as verbal instructions given by supervisors or trainers.
- Following the instructions: Once the instructions are understood, they should be followed closely and consistently. This includes following safe systems of work and quality working practices, such as wearing personal protective equipment (PPE), using equipment correctly, and following proper procedures for handling hazardous substances.
- Monitoring compliance: Regular monitoring is important to ensure that instructions are being followed correctly and that safe systems of work and quality working practices are being maintained. This can be done through regular inspections, safety audits, and feedback from employees.
- Taking corrective action: If deviations from the instructions are identified, prompt corrective action should be taken to bring practices back into compliance. This may include additional training for employees, changes to procedures or equipment, or the implementation of new controls to mitigate risks.
- Continual improvement: Regularly reviewing and updating instructions, procedures, and processes can help to maintain safe systems of work and quality working practices over time. This can be done through regular safety assessments, feedback from employees, and incorporating best practices from other organizations.
By following these steps, individuals can help to maintain a safe and healthy work environment, reduce the risk of accidents and injuries, and promote quality working practices.
PFX+ | Featured Article
Unit 641 - 2.6 State the methods used for reporting changed circumstances, hazards and incidents in…
Unit 641 - 2.6 State the methods used for reporting changed circumstances, hazards and incidents in…
State the methods used for reporting changed circumstances, hazards and incidents in the workplace.

Unit 641 - 2.6 State the methods used for reporting changed circumstances, hazards and incidents in the workplace.
State the methods used for reporting changed circumstances, hazards and incidents in the workplace.

The methods used for reporting changed circumstances, hazards, and incidents in the workplace can vary depending on the specific workplace, but some common methods include:
- Incident reporting forms: Many workplaces have standardized forms that employees can fill out to report incidents, hazards, or changed circumstances.
- Oral reporting: In some workplaces, employees may be encouraged to report hazards, incidents, or changed circumstances directly to their supervisor or safety representative.
- Online reporting: Some workplaces may have an online reporting system that employees can use to report hazards, incidents, or changed circumstances.
- Anonymous reporting: In some cases, employees may be able to report hazards, incidents, or changed circumstances anonymously, either through a designated reporting mechanism or through a third-party hotline.
- Employee suggestion programs: Some workplaces may have an employee suggestion program that allows employees to provide feedback and suggest improvements, including reporting hazards, incidents, or changed circumstances.
Regardless of the specific method used, it's important for employers to establish a clear and effective reporting system that allows employees to report hazards, incidents, and changed circumstances quickly and easily. This can help to ensure that workplace hazards are identified and addressed in a timely manner, and can help to prevent accidents and injuries.
PFX+ | Featured Article
Unit 641 - 2.4 List the current Health and Safety Executive top five health risks.
Unit 641 - 2.4 List the current Health and Safety Executive top five health risks.
List the current Health and Safety Executive top five health risks.

Unit 641 - 2.4 List the current Health and Safety Executive top five health risks.
List the current Health and Safety Executive top five health risks.
 <ol><li>Respiratory diseases from inhaling hazardous substances</li><li>Hand-arm vibration syndrome (HAVS)</li><li>Noise-induced hearing loss</li><li>Work-related stress, depression, and anxiety</li><li>Skin diseases caused by exposure to hazardous substances or poor hand hygiene.</li></ol>
<p>It's important for employers to regularly assess their workplace for these and other health risks and to take appropriate action to minimize risk and protect workers' health.</p>
PFX+ | Featured Article
Unit 641 - 2.3 List the current Health and Safety Executive top ten safety risks.
Unit 641 - 2.3 List the current Health and Safety Executive top ten safety risks.
List the current Health and Safety Executive top ten safety risks.

Unit 641 - 2.3 List the current Health and Safety Executive top ten safety risks.
List the current Health and Safety Executive top ten safety risks.

- Falls from heig
- Being struck by a moving vehic
- Slips, trips, and falls on the same lev
- Manual handli
- Work-related stress, violence, and bullyi
- Working with asbest
- Noise-induced hearing lo
- Hand-arm vibration syndrome (HAV)
- Respiratory diseases from inhaling hazardous substanc
- Skin diseases caused by exposure to hazardous substances or poor hand hygien.
It's important for employers to regularly assess their workplace for these and other hazards and to take appropriate action to minimize risk and protect workers.
Health & Safety
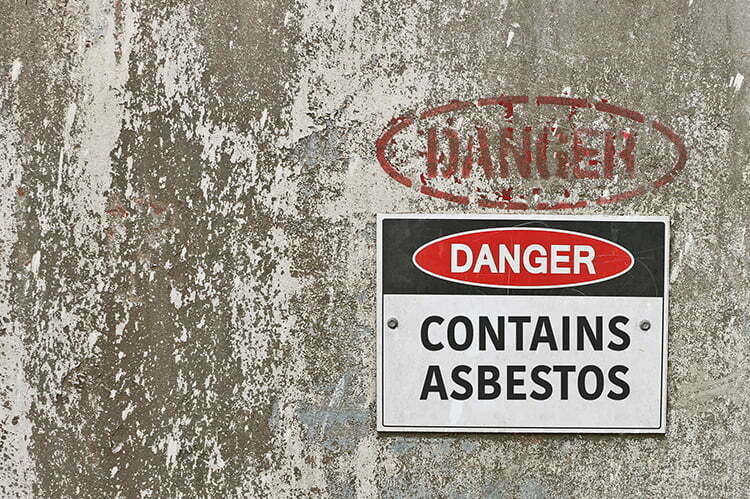
Why is asbestos dangerous? Artex
Why is asbestos dangerous? Artex
Asbestos is a naturally occurring fibrous material which was regularly used in buildings from the 1950s until the late 1990s. It is still found today in many buildings, including homes, schools and hospitals. I
Why is asbestos dangerous? Artex
Asbestos is a naturally occurring fibrous material which was regularly used in buildings from the 1950s until the late 1990s. It is still found today in many buildings, including homes, schools and hospitals. I

Asbestos is a naturally occurring fibrous material which was regularly used in buildings from the 1950s until the late 1990s. It is still found today in many buildings, including homes, schools and hospitals. If disturbed, it can be a killer. Asbestos was widely used as an insulation and fire proofing solution.
Asbestos can be found in any building built before the year 2000 (houses, factories, offices, schools, hospitals etc) and causes around 5000 deaths every year.
When materials that contain asbestos are disturbed or damaged, fibres are released into the air. When these fibres are inhaled they can cause serious diseases. These diseases will not affect you immediately; they often take a long time to develop, but once diagnosed, it is often too late to do anything. This is why it is important that you protect yourself now.
Asbestos can cause the following fatal and serious diseases:
- Asbestos still kills around 5000 workers each year, this is more than the number of people killed on the road.
- Around 20 tradesman die each week as a result of past exposure
- However, asbestos is not just a problem of the past. It can be present today in any building built or refurbished before the year 2000.
Mesothelioma
Mesothelioma is a cancer which affects the lining of the lungs (pleura) and the lining surrounding the lower digestive tract (peritoneum). It is almost exclusively related to asbestos exposure and by the time it is diagnosed, it is almost always fatal.
Asbestos-related lung cancer
Asbestos-related lung cancer is the same as (looks the same as) lung cancer caused by smoking and other causes. It is estimated that there is around one lung cancer for every mesothelioma death.
Asbestosis
Asbestosis is a serious scarring condition of the lung that normally occurs after heavy exposure to asbestos over many years. This condition can cause progressive shortness of breath, and in severe cases can be fatal.
Pleural thickening
Pleural thickening is generally a problem that happens after heavy asbestos exposure. The lining of the lung (pleura) thickens and swells. If this gets worse, the lung itself can be squeezed, and can cause shortness of breath and discomfort in the chest.
For more information visit http://www.hse.gov.uk/Asbestos/
Cancer and construction: Silica
Cancer and construction: Silica
Silica is a natural substance found in varying amounts in most rocks, sand and clay. For example, sandstone contains more than 70% silica, whereas granite might contain 15-30%. Silica is also a major constituen
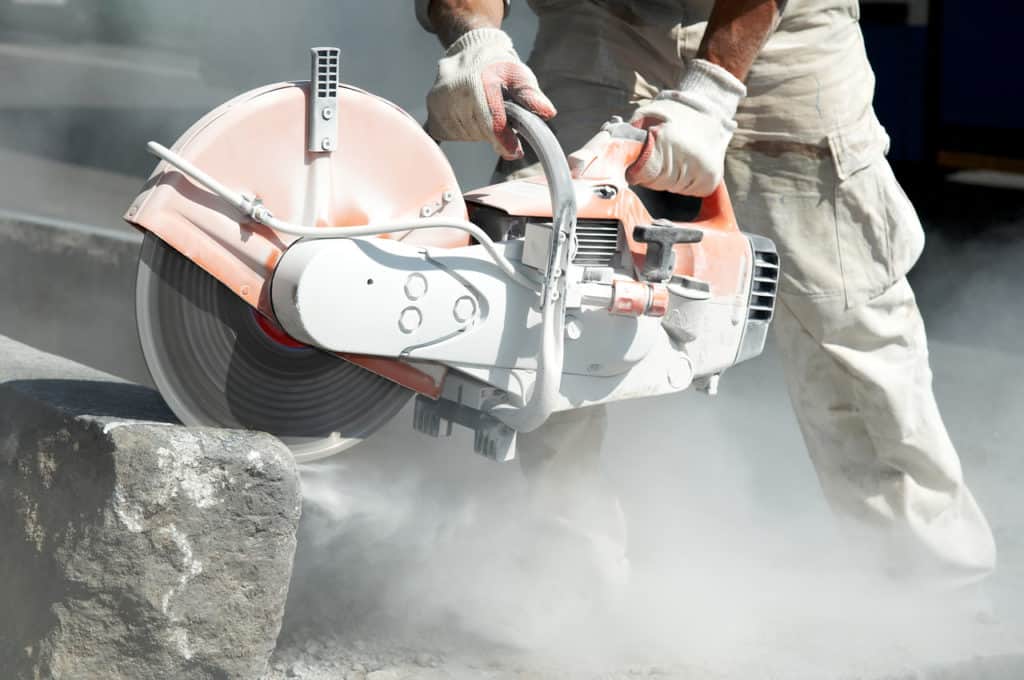
Cancer and construction: Silica
Silica is a natural substance found in varying amounts in most rocks, sand and clay. For example, sandstone contains more than 70% silica, whereas granite might contain 15-30%. Silica is also a major constituen

What is it?
Silica is a natural substance found in varying amounts in most rocks, sand and clay. For example, sandstone contains more than 70% silica, whereas granite might contain 15-30%. Silica is also a major constituent of construction materials such as bricks, tiles, concrete and mortar.
You generate dust from these materials during many common construction tasks. These include cutting, drilling, grinding and polishing. Some of this dust is fine enough to get deep into your lungs. The fine dust is known as respirable crystalline silica (RCS) and is too fine to see with normal lighting. It is commonly called silica or silica dust.
What is the risk to construction workers?
Silica is the biggest risk to construction workers after asbestos. Heavy and prolonged exposure to RCS can cause lung cancer and other serious respiratory diseases. HSE commissioned estimates it was responsible for the death of over 500 construction workers in 2005. In addition to the risks from lung cancer, silica is also linked to other serious lung diseases:
- Silicosis can cause severe breathing problems and increases the risk of lung infections. Silicosis usually follows exposure to RCS over many years, but extremely high exposures can cause acute silicosis more quickly.
- Chronic obstructive pulmonary disease is a group of lung diseases including bronchitis and emphysema. It results in severe breathlessness, prolonged coughing and chronic disability. It can be very disabling and is a leading cause of death. Around 4000 deaths are estimated annually due to COPD resulting from past workplace exposures in the past. Construction workers are a significant at risk group within this.
How to plaster a ceiling or wall. Including mixing Thistle Multi Finish, the process and timings.

PFX+ | Featured Article
Terms & Conditions example
Terms & Conditions example
"The customer" is the party or parties named overleaf who have agreed with us to complete the works that are described. "The works" are the materials to be supplied and installed or constructed by us as descr

Terms & Conditions example
"The customer" is the party or parties named overleaf who have agreed with us to complete the works that are described. "The works" are the materials to be supplied and installed or constructed by us as descr

How To Mix Plaster | Learn To Mix Plaster Correctly
How To Mix Plaster | Learn To Mix Plaster Correctly
If you want to learn how to mix plaster this is the plastering tutorial for you. In this plastering tutorial video i'll show you exactly how to mix plaster.

How To Mix Plaster | Learn To Mix Plaster Correctly
If you want to learn how to mix plaster this is the plastering tutorial for you. In this plastering tutorial video i'll show you exactly how to mix plaster.

Mixing plaster correctly is a crucial skill for achieving a smooth, durable finish in plastering projects. Whether you’re working with traditional plaster or modern plastering products, the fundamentals of mixing remain consistent. Here’s a detailed guide to help you mix plaster properly and avoid common mistakes.
Step-by-Step Guide to Mixing Plaster
1. Gather the Necessary Tools and Materials
Before you start, make sure you have all the required tools and materials ready:
- Clean bucket (at least 25 litres capacity)
- Plaster (e.g., MultiFinish, BoardFinish, etc.)
- Clean water (around 11.5 litres per 25kg bag of plaster)
- Plastering trowel
- Hawk
- Electric paddle mixer (optional but recommended for even mixing)
- Dust mask (for safety)
2. Ensure Cleanliness of Tools and Water
Cleanliness is crucial when mixing plaster. Contaminated water, dirt in the bucket, or dirty tools can all lead to poor plaster performance, causing it to set too quickly or unevenly.
- Clean bucket: Ensure the bucket is free from any remnants of old plaster or debris.
- Clean tools: Wipe down your trowel, hawk, and mixer to prevent contamination.
3. Mixing Proportions
It is vital to use the correct ratio of water to plaster. For most plasters, you will need approximately 11.5 litres of water for a 25kg bag of plaster.
- Start with water: Pour clean, cold water into the bucket before adding the plaster. This helps prevent clumping and makes it easier to achieve a smooth mixture.
- Add plaster gradually: Slowly sprinkle the plaster into the water rather than dumping it in. This gradual addition helps avoid lumps. Let the plaster absorb water for about 2 minutes before mixing.
4. Mixing the Plaster
Once you have added the plaster to the water, it's time to mix.
- Manual mixing: Use a plastering trowel to stir the plaster in the bucket. While this method works for smaller batches, it may not ensure complete smoothness for larger quantities.
- Using a paddle mixer: For larger batches or when a consistent texture is required, an electric paddle mixer is recommended. Insert the paddle into the bucket and start mixing at a low speed, gradually increasing the speed to ensure even mixing.
- Mixing duration: Mix until the plaster reaches a smooth, lump-free consistency similar to thick cream. Avoid over-mixing, as this can cause the plaster to set too quickly.
5. Testing Consistency
After mixing, the plaster should have a smooth, spreadable texture without lumps. The consistency is crucial—too thick, and it will be hard to work with; too thin, and it won’t adhere to the wall properly. If the plaster feels too thick, you can add a small amount of water to adjust it, but do this sparingly.
- Check by lifting: Lift some plaster with your trowel. It should hold its form but also flow smoothly off the trowel without being runny or stiff.
6. Application Timings
Plaster is a time-sensitive material, and knowing when to apply each coat is crucial to achieving a good finish. Below is a general guide for MultiFinish plaster:
- First coat: Apply a 1mm thick first coat immediately after mixing. This initial coat provides adhesion to the background.
- Second coat: After 20–45 minutes, apply the second coat, making sure the total thickness of both coats reaches around 2mm. The second coat should go on before the first coat has fully set, allowing the two layers to bond.
- Trowelling stages: Begin trowelling around 45–60 minutes after the second coat, when the plaster starts to firm up but is still workable. Continue trowelling at intervals (e.g., 90 minutes, 100 minutes, and 120 minutes) until the plaster is fully smooth.
Common Mistakes to Avoid
- Adding too much water at once: Always add plaster to water, not the other way around, to prevent lumps.
- Using dirty water or tools: Contaminants will cause the plaster to set too fast or result in an uneven finish.
- Mixing too much at once: Only mix the amount of plaster you can use within 30–40 minutes. If you mix too much, the plaster will set before you can apply it.
- Incorrect timing: Pay attention to the setting times of the plaster. Failing to trowel at the right time can lead to cracks or a rough finish.
Final Tips
- If you’re working in warm conditions, you might need to work faster, as plaster will set more quickly.
- Cold weather can extend setting times, so plan accordingly.
- Always follow the manufacturer’s guidelines for specific plasters, as different types (e.g., ThistlePro DuraFinish) may have slightly different mixing and application requirements.
By following these steps and tips, you can master the art of mixing plaster and achieve smooth, professional results on your plastering projects. For more detailed instructions and guidance, feel free to explore further resources on plasteringfx.com.
K Rend

K Rend Scraped Texture Render Application
K Rend Scraped Texture Render Application
K Rends scraped texture render is a popular choice for external wall finishes, combining aesthetic appeal with durability. This guide details the step-by-step application process to ensure a flawless finish while maintaining structural integrity.
K Rend Scraped Texture Render Application
K Rends scraped texture render is a popular choice for external wall finishes, combining aesthetic appeal with durability. This guide details the step-by-step application process to ensure a flawless finish while maintaining structural integrity.

Application of K Rend Silicone K1 | Silicone Colour

K Rend Taping and Meshing Application

K Rend Beading Around Windows Application

K Rend - Working to DPC

K Rend External Wall Insulation Application

Monocouche Render
Weber monocouche renders are the ideal choice for a low-maintenance and durable finish.
How To Monocouche Render A Wall - Rendering Tutorial - Monocouche Render Scratch Stone Finish
Applying weberpral M monocouche render with a machine


